
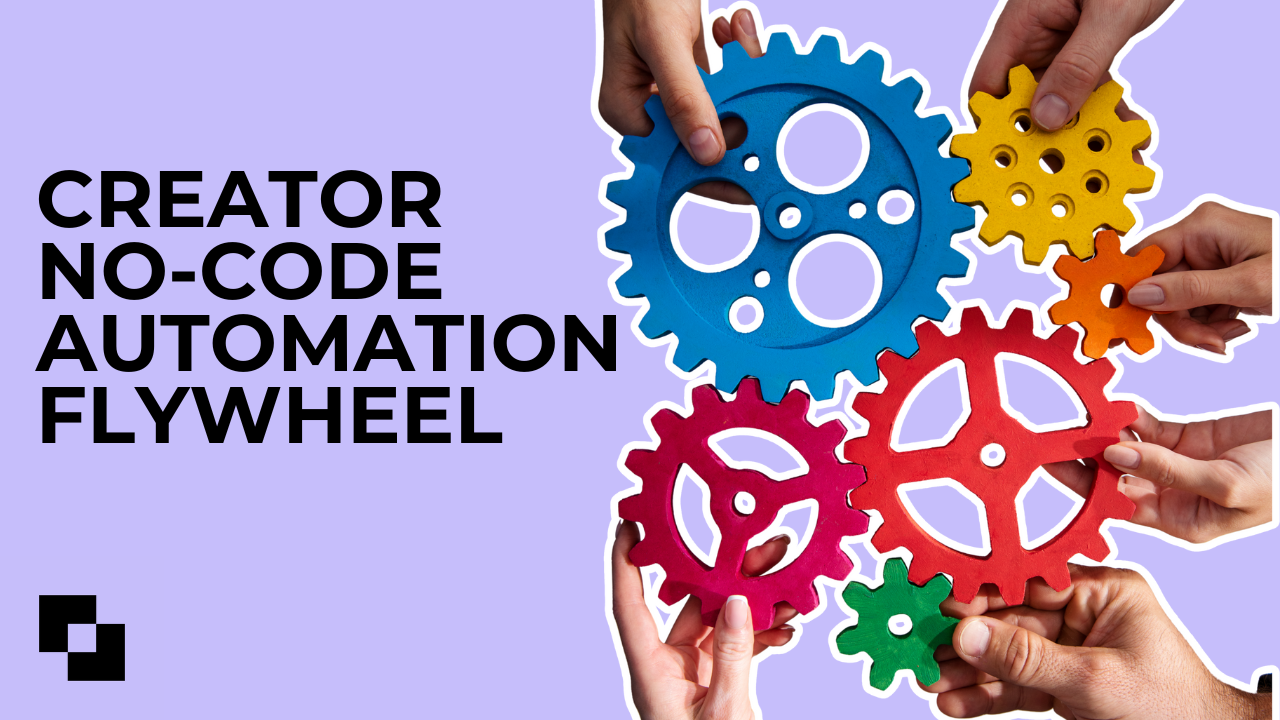
In 2025, AI tools for automation, business, marketing & ops are leveling the playing field for solo content creators. Imagine capturing an Instagram DM lead at midnight, sending them a personalized offer in seconds, taking payment instantly, and welcoming them into your community – all while you sleep. This pillar guide lays out a no-code workflow blueprint to go from your first bot to 1,000 sales, step by step. We’ll cover real creator workflows (no generic AI fluff) that automate the grind and let you focus on creating. By the end, you’ll know exactly how to build an “automation flywheel” that turns casual followers into loyal customers, on autopilot.
Table of Contents
- Why Solo Creators Need a No-Code Automation Workflow – The case for automating your creator business tasks with AI tools.
- Understanding the Creator Automation Flywheel – Overview of the 6-stage automation arc (DM capture to churn prevention).
- Stage 1: DM Keyword Capture – Turning Engagement into Leads
- Stage 2: CRM Tag & Nurture – Build Your Creator CRM Brain
- Stage 3: Instant Payment – Automate the Checkout Cha-Ching
- Stage 4: Onboarding Sequence – Wow New Customers Without Lifting a Finger
- Stage 5: Community Invite – Turning Customers into Members
- Stage 6: Churn-Prevention Triggers – Keep the Flywheel Spinning
- Building Your No-Code Automation Stack (Tools & Tips) – Best AI tools 2025, cost-per-task analysis, failure logs, and agentic workflow tips.
- FAQ – Your Automation Questions Answered (8 Common Questions)
- Conclusion & Next Steps (Free Membership + Resources)
Why Solo Creators Need a No-Code Automation Workflow
Being a solo creator means wearing all the hats – content creation, marketing, sales, customer support, and operations. There are only so many hours in a day, and burnout is real. This is where no-code automation and AI tools come in. They act as your 24/7 virtual team, handling the repetitive and operational tasks so you can focus on your creative zone of genius.
Key benefits of embracing automation:
- Time savings: Routine tasks like sending welcome DMs, posting content across platforms, or updating spreadsheets can be done in seconds by bots instead of hours by you. Imagine an “hours-saved” dashboard showing how many hours automation gave back to you each week – it’s not uncommon for creators to reclaim 5–10 hours weekly by automating busywork.
- Faster response & better engagement: Online, speed matters. If a fan messages you, a fast, helpful reply can turn them into a customer. AI-driven automation (like an Instagram DM bot or an email autoresponder) ensures no fan inquiry goes unnoticed – even at 3AM. Quick responses keep potential customers warm and impressed.
- Scaling up without a team: With the right workflow, you can handle 1,000 sales, support queries, or content posts with the same one-person bandwidth. Automations don’t get tired or overwhelmed. They allow a “solo studio” to operate like a larger enterprise, but on a solopreneur’s budget.
- Consistency and professionalism: Humans are creative but can be inconsistent when juggling too much. Automation tools execute your processes exactly the way you design them, every time. This means every new customer gets the same polished onboarding, every social post goes out on schedule, and every lead receives a follow-up. Consistency builds trust with your audience.
- Personalization at scale: Ironically, automation can increase personal touch. Modern AI tools can insert a follower’s name, tailor content to their interests, or send them relevant offers based on behavior – automatically. You can nurture each fan or customer with timely, personalized touches that would be impossible to do one by one manually.
Why no-code? Because as a creator you shouldn’t need to write code to harness this power. No-code automation platforms (like Zapier and Make) let you connect apps and create workflows with simple logic – if this happens, do that. And with new AI integrations (Zapier AI, Make’s AI Agent, etc.), you can now add decision-making and content generation into these workflows without coding. The barrier to entry has dropped; if you can diagram your process, you can automate it.
Finally, a note on “Automation, Business, Marketing & Ops AI tools” – this guide touches all these areas as they blend together for creators. Marketing chatbots, business process automations, operational task schedulers, AI content tools – they all interlock to support your creator business. Let’s break down the core blueprint that ties these pieces together.
Understanding the Creator Automation Flywheel
Before we dive into the nitty-gritty, let’s map out the Creator Automation Flywheel. This is the end-to-end journey we’ll be automating. Think of it as a loop that continuously feeds your growth:
- 1. DM Keyword Capture: Draw in leads from social media DMs or comments with specific triggers (e.g. someone DMs you a keyword or comments “INFO” on your post). Your bot captures their info and starts the conversation.
- 2. CRM Tag & Nurture: The prospect’s details go into your system (your CRM or email list) with tags that categorize their interest. This way, you can send relevant follow-ups and not lose track of them.
- 3. Instant Payment: When they’re ready to buy, an automated checkout or payment link is delivered immediately. Frictionless purchase – no waiting for you to send an invoice. Payment confirmation triggers the next steps.
- 4. Onboarding Sequence: Right after purchase, the customer receives a warm welcome and any resources they need (course access, welcome PDF, etc.), delivered via automated email/DM sequence. They feel taken care of from minute one.
- 5. Community Invite: New customers are invited to join your creator community (Discord, Slack, Facebook Group, etc.) through an automated message. This turns buyers into members of your ecosystem, increasing loyalty.
- 6. Churn-Prevention Triggers: Ongoing, your system monitors engagement. If a customer starts slipping away (not logging in, not opening emails, etc.), it triggers re-engagement actions – like a check-in email, a special offer, or a friendly “miss you” DM. This helps retain members and repeat customers.
These six stages form a flywheel because as you refine and run them, happy customers bring in more leads (via word of mouth and engagement), which go through the same cycle. Over time, the process accelerates: more leads, more sales, more community growth – without proportionally more work from you.
Crucially, each stage can be achieved with no-code automation tools and a sprinkle of AI, rather than manual effort. Let’s deep-dive into each stage and how you can build it out.
Stage 1: DM Keyword Capture – Turning Engagement into Leads
.png)
The journey often begins in the DMs. Whether it’s Instagram, Twitter (X), YouTube comments, or even email, one of the best ways to capture potential customers is to engage them right at the moment they show interest. DM keyword capture means setting up an automated system to listen for certain keywords or triggers in messages and responding instantly.
Picture this: You post an Instagram Reel about a new mini-course you’re selling. At the end, you say, “DM me the word LAUNCH for a discount link!” Now, without automation, you’d wake up to a dozen DMs saying “LAUNCH” and have to reply to each manually with the info. With a bot, the moment someone sends “LAUNCH”, they get an immediate, friendly reply with your preset message – e.g. “🎉 Thanks for your interest! Here’s the 50% off link to my Launch Course: [link]. Let me know if you have any questions!” You’ve just captured a hot lead (likely a sale) in seconds with zero manual work.
How to set this up (no code needed):
- Choose your platform & tool: If you’re focusing on Instagram DM automation (a big trend for creators in 2025), you can use tools like Vista Social, ManyChat, or MobileMonkey that integrate with Instagram’s API. These platforms let you define “keyword triggers.” For example, inside Vista Social’s social inbox, you can configure a rule: if incoming DM contains “LAUNCH”, then send a specific reply (and even tag the user). Vista Social’s AI Assistant can even generate a draft response in your brand’s tone, which you can set to go out automatically or approve first.
- Define the conversation flow: Keep it simple at first. Your bot’s job in Stage 1 is to deliver what was promised and maybe ask a qualifying question. Using our example, after sending the discount link, the bot might follow up with, “Can I help with any questions about the course? Just ask!” This keeps the door open. Some creators use a sequence: first auto-reply gives the info, a day later another DM pings, “Hey, just checking if you need anything else – the discount is valid for 48 hours. 🙂” (This small drip can nudge indecisive folks.)
- Capture their info: If appropriate, have the bot ask for an email or other detail to feed into your CRM. For instance, “Drop your email here and I’ll send over a detailed syllabus.” When they reply with an email, many DM automation tools can automatically save it or trigger another zap (more on that in Stage 2). If the platform doesn’t allow collecting email directly in DM, you can give a link to a signup form landing page – not as seamless, but it works.
- Multiple entry points: Keyword triggers aren’t just for DMs. On Instagram and TikTok, consider using comment triggers too. For example, “Comment 💡 below and I’ll DM you a free guide!” – Using a tool like ManyChat’s Instagram integration or Followr AI, you can set it such that anyone who comments gets an immediate DM from your account with the guide link. It’s a clever way to move people from being passive followers to engaged leads in your funnel.
Real-world quick example: Ali is a fitness coach on Instagram. She set up a ManyChat automation so that whenever someone messages “WORKOUT” after seeing her Story, they get an immediate reply with a free PDF of her 3-day workout plan, and a question asking about their fitness goal. She wakes up to 20 new engaged conversations in her inbox – all handled initially by the bot. Out of those, 5 convert to sales of her paid program within 24 hours. That’s the power of Stage 1: capturing interest and starting the sales conversation while it’s hot.
Best practices: Keep your automated DM responses short, human-sounding, and helpful. Use the person’s name if possible (“Hey [Name]!”) – personalization signals that it’s not pure spam. Clearly deliver what was promised (e.g. the link or info they asked for) before anything else. And always give a way to reach a human or get more help: e.g. “If you need custom help, just type HELP and I’ll personally respond!” That way the user feels in control and respected. This also helps with GDPR concerns – you’re essentially doing one-to-one communication which users initiated, but if you plan to add them to a broader list, you’ll need consent (more on that next).
Quick Win – DM Capture: Pick one platform (say, Instagram) and one simple keyword offer (“DM me ‘X’ for Y”). Set up a bot to handle just this. This single automation can start pulling in leads this week. For example, set up “DM me START to get a free 5-page guide” as your test. It’s an easy, fast win that lets you watch the automation in action. You’ll learn a ton from this first bot – and perhaps even get your first automated sale.
Stage 2: CRM Tag & Nurture – Build Your Creator CRM Brain
Now that your first bot is collecting leads from DMs or comments, you need to capture and organize those leads. Otherwise, they’ll slip through the cracks after the initial conversation. Stage 2 is all about moving that contact into your database – whether it’s an email marketing system, a spreadsheet, a CRM, or whatever you use – and tagging them so you know who they are and what they’re interested in. Think of this stage as building your creator brain: a memory of every person who’s engaged with you and what they might want.
What do we mean by tags? Tags are like labels or categories. For a creator, useful tags might be things like “Prospect – interested in course”, “Customer – bought eBook”, “VIP fan”, “Collaboration inquiry”, etc. In our Stage 1 example, if someone DMed “LAUNCH” about your course, you’d tag them maybe as “Lead – Launch Course”. Later, if they buy, you’ll update the tag to “Customer – Launch Course”. These tags let you filter and segment communication, so you can send targeted content (like a special offer to leads who haven’t bought, or a bonus module to those who did).
No-code ways to implement Stage 2:
.png)
- Connect your DM tool to a spreadsheet or CRM: The simplest route, especially if you’re just starting and don’t have a fancy CRM, is to use Google Sheets as a lightweight database. You can use Zapier or Make (Integromat) to connect your social media DMs to Google Sheets. For example, create a Zap: trigger = new Instagram DM with keyword “LAUNCH” (via ManyChat webhook or an Instagram integration), action = add a new row in Google Sheet with username, name, and “Lead – Launch Course” in the tag column. This way, every lead is logged. Alternatively, if you have an email marketing tool like Mailchimp, ConvertKit, or HubSpot, connect the Zap to add them as a contact there (with a tag/property indicating how they came in).
- Automate the tag in your CRM: Many CRM or email platforms allow incoming contacts to be tagged automatically via specific signup forms or API calls. If using something like ConvertKit, you could have a specific form or link for that DM freebie; when someone signs up through it, they automatically get a tag “Launch Freebie”. Some DM automation tools (like ManyChat) can directly integrate with email platforms to add a contact as soon as the person provides their email in the chat flow. Choose an integration method that fits your stack. The key is don’t rely on manual copy-pasting – it’s error-prone and defeats the purpose.
- Use AI to enrich the contact (optional advanced): Here’s a cool 2025 twist – tools like Zapier AI and Make’s AI Agent can enrich lead data automatically. Suppose your lead only gave you their Instagram handle and email. You could have an AI step that looks up their name from Instagram or infers their time zone or checks if the email domain is corporate vs. gmail (to gauge if they’re a business). Zapier’s AI Actions could, for instance, take the user’s name and craft a personalized greeting to store (“Notes” field: “Met via IG, interested in Launch course”). While not necessary, these agentic touches start to make your CRM entries richer without you typing a thing. It’s like having a virtual assistant research each lead for you.
- Nurture with drip sequences: Once tagged and in your system, you’ll want to follow up beyond the initial DM. This often means an email nurture sequence or additional DMs over time. For example, everyone tagged “Lead – Launch Course” could get a series of emails: Day 1: “Tips to get started in launching”, Day 3: “Common mistakes to avoid...”, Day 5: “Last chance to use your discount, here’s a success story...”. You can write these once (or even use an AI writer like Taskade AI or Blaze AI to help draft them in your voice) and have them send automatically. Most email marketing tools let you build these automations easily (no code, just a visual flow: wait X days, send email Y). If you prefer DM-based nurturing (higher open rates, but trickier on some platforms), ensure your tool supports a sequence – ManyChat, for example, can do multi-day message sequences on Messenger or IG DMs. Just be mindful of platform rules to avoid spam flags.
Why tagging and nurturing matters:
This stage is the bridge between someone showing interest and actually buying. Without it, you have a bunch of lukewarm leads floating around. With it, you have a structured way to warm them up. It also protects you against algorithm changes – if Instagram decides to show your content less, you’ve at least collected emails and data to reach your audience directly. It’s your safety net and your conversion engine.
Quick case story: Jason, a YouTube creator, offered a free mini ebook to anyone who filled a Google Form (linked from his video description). He used Make.com to automatically send those form entries into Mailchimp with a “Ebook Lead” tag. Then an email drip would send the ebook and, over two weeks, more emails about his paid course. His results? A 12% conversion rate from freebie to paid course, all automated. He just focused on creating a great ebook and videos, and let the system do the follow-ups. Now he knows every “Ebook Lead” in his list is a potential customer being steadily nurtured.
Pro Tip – Tag Everything: In your creator business, data is power. Try to tag and categorize contacts by source and interest. Over time, you’ll learn which channels bring the highest-converting leads (maybe Instagram DMs convert better than Twitter DMs, or YouTube freebie seekers are more engaged). Then you can double down on what works. Most no-code automations can pass along metadata – use that.
Stage 3: Instant Payment – Automate the Checkout Cha-Ching
Here’s where the rubber meets the road: turning that warmed-up lead into a paying customer. Stage 3 focuses on making the purchase process instant, seamless, and automatic for the buyer – no waiting for you to send an invoice or payment link manually. In a traditional setup, a follower might say “I’m interested!” and you’d go back and forth to finalize the sale. Not in our automated world: we want them to be able to click “Buy Now” and get it done right away, even if you’re out hiking or asleep.
Elements of an automated payment workflow:
- Always-available checkout links: If you sell digital products, courses, coaching sessions, or even physical merch, set up a system where a checkout link can be given to the customer automatically. Tools abound for this: you can use platforms like Gumroad, ThriveCart, Shopify (for physical), or even a simple PayPal/Stripe payment link. The key is that the link is live 24/7 and delivers the goods (or notifies you) upon purchase. For example, Stripe now allows you to create product checkout pages that you can share as links; these pages handle all the tax (VAT) calculations and receipts automatically.
- Integrate with your chat/email flow: How does the link reach the user? Via the same channel they engaged on, if possible. If they’re in an email sequence, email them the link when they’re ready. If they’re in a DM conversation, you can literally drop the checkout link in chat (ManyChat’s Stripe integration allows you to process payments inside Messenger or IG DMs without leaving the chat – super slick for the user). If not that fancy, at least the bot can say “Great, you’re ready! Here’s a secure link to complete your purchase: [link].”
- Instant confirmation and next steps: The moment payment is completed, two things should happen: (1) you (the creator) should get notified (so you know you made a sale – this is motivating and also important to catch any issues), and (2) the buyer should immediately get a confirmation and instructions on what’s next. No one should ever wonder “Did my payment go through?” in an automated funnel. For notifications, you can have the payment platform email you, or use Zapier to ping you on Slack/Discord or even SMS. For buyer confirmation, most payment platforms let you redirect to a confirmation page or send an automatic receipt email. Customize those if you can – e.g. add a personal thank-you note. Additionally, tie this with Stage 4: trigger the onboarding sequence right away (more on that soon).
- Handling discounts, currencies, VAT, etc.: This is a bit “ops” heavy, but worth mentioning because it can be automated too. If you sell internationally, dealing with VAT (Value Added Tax for EU, UK, etc.) can be a headache manually. Fortunately, many modern checkout tools (Stripe, Gumroad) handle VAT for you – they calculate based on buyer’s country and even handle VAT ID validation. Automation stack cost sensitivity tip: Sometimes creators use multiple tools that overlap. If budget is a concern, choose a platform that covers more bases. For example, an all-in-one like Podia or Kajabi might handle the sales page, payment, email automation, and content delivery in one – reducing the need for multiple subscriptions. On the flip side, those can be pricey monthly; you might achieve the same with a combo of cheaper tools if you integrate them smartly (e.g., Gumroad + Mailchimp + Zapier might cost less overall than a big suite). Always weigh the cost of convenience vs. doing a bit of integration work. We’ll do a brief cost analysis in the tools section.
Failure logs & error handling:
Let’s address a real scenario – sometimes an automation fails. Perhaps the payment goes through but the next zap fails to add the customer to the email list, or the DM bot couldn’t send the link because the user had left the chat. It’s crucial to monitor and have “failure logs” or alerts. Both Zapier and Make allow you to see task history and set up alerts for errors. For instance, you could tell Zapier “if any step errors, send me an email with the error info.” Make (Integromat) scenarios can have error handler routes. As a solo operator, you don’t want silent failures. So as you implement Stage 3 and beyond, periodically check the logs of your automation or set up those alerts. It might sound technical, but it’s typically just ticking a setting or adding a simple extra step in your workflow. Think of it as having an automated supervisor that flags you when something needs your attention.
Quick Win – Instant Payment Link: Set up a universal payment link for your current offering. If you’re selling a $50 product, get a direct Stripe checkout link or a PayPal.me link for $50, and have it ready. Even if you haven’t automated everything else yet, being able to instantly drop a “Buy Now” link into a conversation massively increases your chances of closing the sale on the spot. People’s enthusiasm wanes quickly; catch it while it’s hot. As you build your automation, you’ll plug this link in at the right point, but get it prepared now.
Pro Tip: To increase conversions, reduce friction. That could mean enabling Apple Pay/Google Pay on your checkout (most modern processors do this automatically) so users don’t even have to pull out a card. It also means thinking through any extra steps – for example, if you promised a 50% discount in the DM, make sure the link already has that discount applied. Don’t send them to a generic page where they might get confused or see a full price. Every extra click or confusion point can kill the sale. A well-designed automation hand-holds the buyer smoothly from interest to payment with as few clicks as possible.
Stage 4: Onboarding Sequence – Wow New Customers Without Lifting a Finger
.png)
Sale made! Congrats – you’ve got a new customer. But your work isn’t done; in fact, the experience your customer has right after purchasing is critical. A great onboarding can turn a one-time buyer into a raving fan (or a repeat buyer), while a poor or nonexistent onboarding can lead to refunds or disengagement. Stage 4 is about automating that post-sale welcome and onboarding sequence so that every customer gets VIP treatment, whether you’re at your desk or not.
Goals of an onboarding sequence: Immediately deliver what was promised, make the customer feel welcomed and valued, provide any instructions or next steps, and keep their excitement high. Essentially, reassure them “that purchase was a great idea and here’s how to get the most out of it.”
Setting up an automated onboarding sequence:
- Instant fulfillment: If you sold a digital product (e.g. an eBook, a course login, a download link), automation should handle delivering it. For example, if you sell an online course, your system (could be Teachable, Kajabi, Gumroad, etc.) should automatically send the user an email with their login or the PDF attached, etc., immediately after payment. Most platforms have this built-in. If not, Zapier can connect a payment event to sending an email with an attachment via Gmail/Outlook or adding them to a mailing list that sends the content. No one should be left waiting wondering how to get what they paid for.
- Personalized welcome message: In addition to the receipt or product delivery, send a personal-sounding welcome. This could be an email that feels like a letter from you, or even a personalized video message if you want to go fancy (yes, you can automate personalized videos with some tools, but to keep it simple, an email with their name and a warm tone is great). You can draft this yourself, but if writing’s not your forte, try using AdCreative.ai or Blaze AI to help craft an engaging welcome email. These AI copy tools can suggest creative phrasing on how to thank them and get them excited to use the product. Just be sure to edit so it’s authentically your voice.
- Guided first steps: Outline 2-3 simple steps the customer should take to get started. For a course: “1) Log in using the details above, 2) Watch the 10-min intro video, 3) Join our community to meet fellow students (invite in next email!).” For a service or coaching: “Fill out this onboarding form” or “Book your first call here.” Automate these instructions via a short sequence of messages or emails. Perhaps the first email has login info, the second email (sent Day 2) checks in: “Everything working? Here are tips to get the best results…”, etc. This can all be pre-written and scheduled in your email platform triggered by the purchase tag.
- Leverage AI for tailoring content: One cool trend is agentic editors and AI-personalized content. For example, you could use an AI to adjust the wording or even the content of onboarding materials based on the tag or source. Suppose you have two types of customers – one coming from Instagram, one from YouTube – and you know the Instagram folks care more about aesthetic visuals (just an assumption). An AI agent could swap out examples or wording in the onboarding emails to better resonate with each group. This is advanced, but it’s becoming more accessible. For instance, OpenAI’s GPT-4 via Zapier could modify a paragraph of your email before it’s sent, to insert a relevant example (“As an Instagram creator, you might appreciate…”) for IG-tagged customers. This level of personalization at scale was unheard of a few years ago and now it’s within reach without coding. That said, even a basic one-size-fits-all sequence is fine to start!
- Onboarding across channels: Email is typical for onboarding, but consider mirroring important welcome info on other channels too, for redundancy. You might send a quick “Hey, saw you joined – check your email for all the details 🎉” DM automatically after purchase (if you still have them in chat from earlier). Or a text message if you collected phone numbers (tools like Twilio or simpler SMS tools can integrate via no-code). The idea is to cover your bases so the customer doesn’t miss the info and feels supported. However, be mindful of not overloading or spamming; one or two touchpoints are enough, and make sure they provide value (no pure marketing fluff here, they already bought – now it’s about service).
Avoiding common pitfalls:
A major thing to avoid is a gap or silence after purchase. Especially for digital products or courses – if someone pays and then hears nothing for hours, they might panic or get buyer’s remorse. Automation solves that by immediate acknowledgment. Another pitfall is overwhelming new users with too much info. Yes, we have sequences, but don’t unload 20 resources and links in one email. Spread it out, keep it step-by-step. Also, consider GDPR and consent here: since they made a purchase, transactional emails are fine legally. If you also added them to a newsletter list for marketing, make sure you had consent for that. It’s best practice to let them know what communications they’ll receive. (E.g., “You’ll get a few onboarding emails from me over the next week. Also, I’ll send creator tips occasionally – you can unsubscribe anytime.” Transparency builds trust and keeps you compliant.)
Quick Win – Welcome Email Template: Draft a single welcome email that you can send to any new customer. It should thank them by name, restate what they bought (“your investment in [Product Name]”), and list maybe 3 next steps or resources. Once you have this template, set up your system to send it automatically when someone buys. Even if you haven’t built a full sequence, this one automated email dramatically improves the customer experience. You can always expand it into a longer sequence later.
Pro Tip: Turn onboarding into a conversation, not a lecture. One strategy is to include questions in your automated emails that encourage reply. For example: “Reply and let me know – what’s the #1 thing you’re hoping to achieve with [product]?” Since they’re excited, many will respond. Now, even though we’re automating, you (or your AI) can scan these replies. It’s qualitative gold: you learn why people bought and can tweak future messaging. Plus, when you (or an AI agent on your behalf) reply to those answers, you build a real connection. This is where you can blend automation and personal touch beautifully: let the sequence handle 90% of routine info delivery, freeing you to focus on the meaningful interactions.
Stage 5: Community Invite – Turning Customers into Members
Beyond just delivering a product, many creators are building communities around their brand – private Discord servers, Facebook Groups, Slack communities, etc. If you have (or plan to have) a community aspect, inviting new customers to join is a smart move. It increases engagement, provides more value (they can network with others, get peer support), and increases the likelihood they’ll stick around for future offers. Stage 5 is about automating the community invitation so no customer misses out on becoming part of your tribe.
.png)
How to automate community invites:
- Decide on the community platform: Popular choices are Discord, Slack, Facebook Groups, Circle.so, or even WhatsApp/Telegram groups for some niches. Each has different joining mechanics. For instance, Discord can invite via a link, Slack can invite via email, Facebook Group might need them to click and request. You want to streamline this as much as possible.
- Include the invite in onboarding: The easiest place to invite is in your onboarding emails (Stage 4). For example, “Step 3: Join the community – here’s your invite link: [discord.gg/yourcommunity]”. If it’s a Discord or Slack, you could make a permanent invite link if open, or better, a single-use personalized invite if you want to keep it exclusive to customers. There are automation ways to do this: Zapier has integrations with some community platforms. For example, using a Discord bot or Zapier’s Discord integration, you can have it automatically DM a new user an invite or add their role. If using Circle or Facebook, you might just drop the link and perhaps include a membership question “what email did you use to purchase?” to verify.
- Follow-up if they don’t join: Here’s where automation can save the day. Often, people intend to join the community but forget or postpone. You can set up a reminder. For instance, if after 7 days a customer hasn’t clicked the invite link (some email platforms can tag who clicked, or simpler, you send a second email regardless), send a friendly nudge: “We’d love to see you in the community – some great discussions happened this week. Here’s your personal invite link again in case you missed it.” If your system is sophisticated, you can even trigger that email only if your system detects they haven’t joined. How to detect? If the community platform can send a notification to Zapier when someone joins, you could mark them in your CRM. But that’s advanced and often not straightforward with every platform. A simpler approach: just include a generic follow-up to all new customers after X days highlighting the community again. Those who joined will ignore it, those who didn’t will appreciate the reminder.
- Leverage community as value-add: In your automated messaging, highlight why they should bother joining. “Connect with 500+ creators”, “Weekly live Q&A sessions in the group”, “Accountability and challenges happen here”. People are busy; show them the benefit. This is partly a marketing job, but you can template it. Perhaps even use Predis.ai or Ocoya (both AI social content tools) to craft a compelling snippet about your community’s vibe, to include in the invite message. Keep it friendly and not too formal. A mentor-like tone works well: “I really encourage you to hop in – it can be a game-changer to surround yourself with others on the same journey. I’m in there daily too to help.” Such a message feels personal even if automated.
Community invite via SMS/DM:
Depending on the demographic, sometimes an email invite gets lost but a text or DM gets attention. You could, for example, use a phone number field and automatically text them a join link (using an SMS service integration). Or if your Stage 1 and 2 kept the conversation going in DM, you can drop the invite link via DM as well, saying “By the way, I just sent you an invite to our private community. Join us!” This multi-channel approach ensures they see it.
Note on GDPR and privacy: If your community is on a platform like Facebook, sharing customer data (like auto-adding emails to Slack) might have privacy implications. Always make sure you have user consent if you’re moving their data around. For example, adding someone’s email to Slack via an invite – technically you’re using their email for something they didn’t explicitly sign up for. To be safe, make the community opt-in (they click a link or respond “yes add me”). That said, if it’s positioned as part of the product (“includes community access”), then it’s a legitimate interest to invite them. Just be transparent: “You’ll get an invite to our private group as part of your purchase.” And of course, respect if someone doesn’t join – don’t badger them endlessly.
Quick Win – Group Welcome Post: Automate a personal welcome for each new member in the community. For instance, if using a Facebook Group, you can use a tool or Zapier to detect when a new member joins, then automatically publish a welcome post tagging them: “Welcome @JaneDoe! Introduce yourself 🙂.” On Discord, you can set up a bot to send a welcome message or put them in a #welcome channel. These touches can be set up once and they make new members feel noticed. Even if you’re not there at that moment, your automation ensures no one enters silently. (Just double-check the automation’s working from time to time.)
Pro Tip: Encourage user-generated content or interaction as part of onboarding. For example, automatically prompt new members with a fun task: “Share a photo of your workspace in the introductions channel!” or “Reply to this thread with one goal you have.” This can actually be semi-automated by preparing a scheduled post or a bot message. The reason this is in an “automation” article is because building a thriving community is a force multiplier – it’ll eventually sustain itself and even help onboard new people for you (experienced members answer newbie questions, etc.). That’s organic automation in a sense! But it starts by getting folks in there and nudging them to engage early. Use your automated systems to ensure they get that nudge.
Stage 6: Churn-Prevention Triggers – Keep the Flywheel Spinning
The final stage of our flywheel addresses something many creators overlook: customer retention and churn prevention. You worked hard (or rather, your automations did!) to get a customer and nurture them – now make sure they remain happy and stick around for your future launches, renewals, or membership continuity. Churn can be a killer for any creator offering subscriptions, memberships, or repeat products. Fortunately, we can automate some smart triggers to catch the warning signs and act on them proactively.
Churn signals to monitor: Depending on your business model, common signs of an at-risk customer include: not logging into your course or platform for X days, not opening the last few emails, a failed payment, a drop-off in usage (e.g. if you run a SaaS or an app), or even lack of recent purchases if you have multiple products. For community-based memberships, not posting or participating could be a sign of disengagement.
.png)
Automated triggers and actions:
- Login/Activity tracking: If you host a course or membership on a platform that supports integrations (like Thinkific, Teachable, Kajabi, Memberstack, etc.), see if you can get data out. Some platforms have Zapier triggers like “User hasn’t logged in for 30 days” or at least an API you can poll. If direct integration is not available, a scrappier way: export user activity monthly and feed it to an AI or script – but that’s code-ish. Let’s focus on no-code: Tools like Reclaim AI can help you schedule tasks and even remind you to reach out, but for actual triggers, you might use a combination of your CRM and Zapier. For instance, if you tag members when they join, you can set up an automation: every week, check who in “Active Members” hasn’t opened any emails in 30 days – then add a “at-risk” tag and send a re-engagement email. Some email marketing systems (e.g. ActiveCampaign) can do this internally with segments and automations (no Zapier needed).
- Re-engagement messages: Once a customer is flagged, send a personalized message automatically. Example: an email with the subject “Everything okay, [Name]?” and content like “We noticed you haven’t been around much. Is there anything we can help with or any feedback on [product]? We’d love to see you back – here’s a quick tip to get back on track: …”. This kind of email shows you care and often prompts the person to either re-engage or at least tell you why they left. You can also offer an incentive: “Here’s a 20% off coupon for your next month” or “Let’s hop on a quick free coaching call to get you unstuck.” You wouldn’t want to offer that to everyone, but automation can target just the slipping-away folks.
- Churned customer win-back: If someone does cancel or hasn’t purchased in a long while, have a later trigger to try to win them back. For example, 3 months after churn, send a “We miss you – here’s what’s new” update highlighting new content or features that have been added, plus maybe a promo to rejoin. AI can help craft these messages so they don’t sound generic. Perhaps use Surfer SEO (normally an SEO tool, but its content insights might help you phrase things appealingly?) or just GPT to add some creative spin: e.g., “Since you left, we released 5 new lessons and a community app – it’s better than ever.” Make the person feel the FOMO for leaving.
- Dashboard for retention metrics: Now, this might be slightly beyond pure no-code, but even a Google Sheet or an Airtable can serve as a mini dashboard. As you have automations tagging “at-risk” or “churned” or “active” members, you can tally numbers. For example, using Zapier to increment a counter in a Google Sheet each time someone churns or each time someone re-engages. Over time, you could have something like: Active members: 95, At-risk: 10 (10.5%), Churned last month: 5, Saved from churn: 3. These are powerful metrics to know for your business health. It’s like having an ops team do cohort analysis for you – but automation did it. If you’re not a data person, at least set up the triggers and actions; you can always analyze the data later (or have an AI agent analyze it!).
Speaking of which, AI agents can play a role here too. Tools like Zapier’s AI Agents or Make’s AI Agent could actually handle some individual outreach in a semi-autonomous way. Imagine an AI agent that scans your community forum to see who asked a question and didn’t get a response – then pings you or even crafts a reply to help. Or an agent that monitors sentiment: if someone posts “I’m frustrated with X”, it alerts you to intervene before they quit. These are “agentic workflow tips” that push automation beyond just scheduled tasks into a more adaptive, intelligent realm. We’re in early days of this, but keep an eye on it. For now, even simple triggers like described above will put you miles ahead in customer retention.
Quick Win – Check-In Email: Set up a single automated check-in email to go out X days after purchase. For example, 14 days after someone buys your course, have an email that says, “Hi [Name], just checking in! How are you finding [Course]? Any questions or feedback? Hit reply, I read every response.” This is easy to implement in most email systems by adding a delay + email in your onboarding automation. It serves as both a personal touch and an early churn prevention tactic, because if they haven’t even started or are confused, this reminds them and opens a channel for them to ask for help. Many users who go silent just need a nudge or have a small hurdle; catching that early can save the relationship.
Pro Tip: Use “hours-saved” dashboards or reports to keep yourself motivated in maintaining these automations. Some tools like Zapier provide a rough estimate of time saved (e.g., “This month your Zaps ran 500 times, saving you approximately 50 hours”). While these numbers are just estimates, they’re great for justifying your automation stack cost and effort. You can also manually estimate: If Stage 1 bot handles 100 DMs that would’ve taken you 2 minutes each to respond, that’s ~200 minutes (3+ hours) saved. If your hourly rate to yourself is $30, that’s $90 of value created by that bot in maybe $10 of tool cost – awesome ROI! Keeping such stats can underscore the power of your “automation flywheel” and help decide where to invest more or tweak things. It’s like a game: how many hours can you save next month while increasing sales? Let the machines do the boring stuff, so you can do the creative and strategic stuff.
Building Your No-Code Automation Stack (Tools & Tips)
We’ve walked through the blueprint stages – now let’s talk about the tools that make it all possible, plus some important tips on costs, logging, and using AI agents wisely. This section is your high-level guide to the best no-code automation tools of 2025 for solo creators, featuring the ones we’ve hinted at throughout the guide and how they fit into your workflow.
The 2025 Toolkit: AI-Powered Tools for Content Creators
There are hundreds of tools out there, but you don’t need them all. Here’s a curated list of categories and top tools (including those requested to feature) that can empower each part of the automation flywheel:
- Social Media & DM Automation: To capture leads and manage engagement, look at Vista Social, Followr AI, and Ocoya. Vista Social is an all-in-one social media management platform with an AI assistant that can generate replies and help with social listening. It’s great for scheduling posts across platforms and even handling DMs in one inbox. Followr AI similarly helps automate content creation and scheduling with AI, aiming to grow your social presence with minimal effort. Ocoya is another content automation tool – it can create social media graphics and captions using AI and schedule them. For more chat-specific automation, ManyChat (not AI per se but very powerful for IG/FB messaging) or MobileMonkey can implement those Stage 1 chatbots. Weave these in to capture and engage your audience on social.
- Content Creation & SEO: Creating quality content consistently is a huge part of marketing for creators. Tools like Blaze AI and Predis.ai assist in generating and repurposing content. Blaze AI is like having a combined copywriter and designer – it helps generate blog posts, social posts, even videos quickly, with your brand voice and SEO in mind. Predis.ai focuses on social media creatives: it can suggest post ideas and even create them (think captions, hashtags, creatives) based on trends. Then there’s Surfer SEO – while not directly an “automation” tool, it’s an AI-powered platform to optimize your blog or YouTube content for search. If part of your funnel is attracting leads via search (say a blog post that then invites readers to DM you a keyword), Surfer SEO ensures that content ranks well. It integrates with content editors to give live suggestions (great for solopreneurs to ensure your DIY content competes with the big guys). vidIQ is the YouTube counterpart – an AI-driven YouTube optimization tool to help you pick titles, tags, and understand how to get your videos discovered. If your content strategy includes YouTube (and it should for many creators), vidIQ can save you hours in research by providing instant recommendations and competitor insights.
- Ads and Creative Automation: If you run ads for your products, AdCreative.ai is a gem. It uses AI to generate dozens of ad variations (images and copy) tailored for higher conversion, in seconds. Instead of manually designing ad graphics or writing copy, you can input your brand colors and message, and it produces ready-to-run ad creatives that are data-backed. This is a boon for creators who don’t have a design team but want to test multiple ad angles quickly. It also ensures your ads don’t all look the same – variety can prevent ad fatigue among viewers.
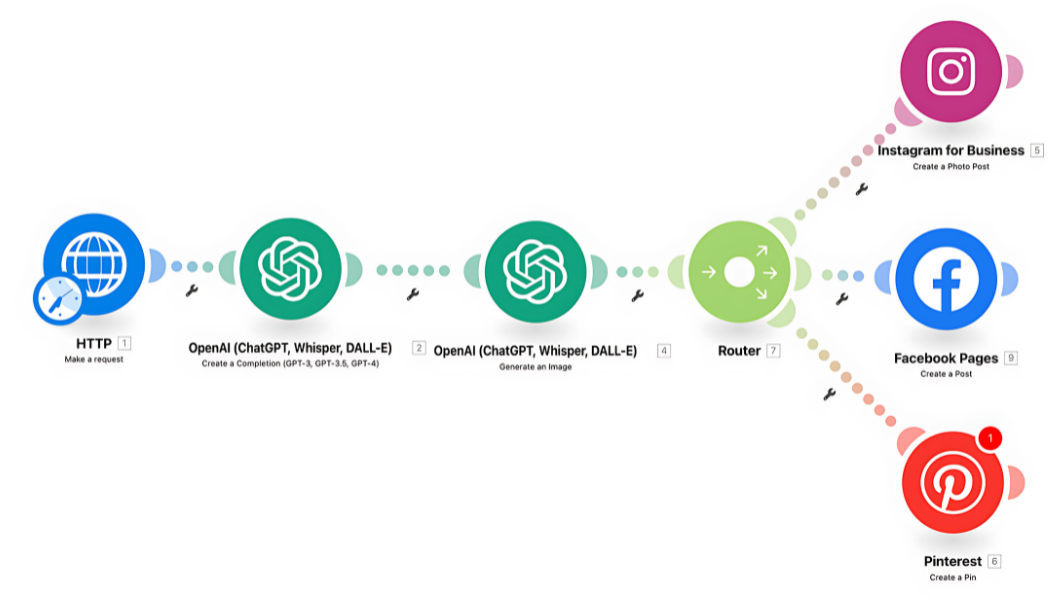
- Workflow Automation Platforms: The backbone of connecting everything is usually Zapier or Make. Zapier is the go-to no-code automation platform with thousands of app integrations; in 2025, it’s further supercharged by AI. They’ve introduced Zapier AI which includes things like AI-powered data formatting and even the ability to have ChatGPT in your Zaps for summarizing or making decisions. They also launched Zapier Agents (in beta) – think mini AI assistants that can perform multi-step tasks across apps (e.g., an agent that reads your email for leads, logs them in CRM, sends a reply). Make (Integromat) is the other big player, known for its visual flow builder and cheaper pricing at scale. Make’s new AI Agent feature allows you to set up autonomous agents that can handle tasks like a human would (for example, manage inventory or social media interactions as shown by early use-cases). Choosing Zapier vs Make often comes down to budget and complexity: Zapier is usually simpler but pricier, Make offers more complex scenarios and ops at a lower cost but can be a bit technical. For a solo creator in 2025, both have free plans to start. Zapier vs Make pricing for creators: In short, Make’s $9/month plan gives you 10,000 ops (actions) which is a lot, whereas Zapier’s $20/month gives 750 tasks. But note, Make counts every trigger check as an op, so if you have frequent checks, those 10k can go faster than you think. Zapier only counts actual actions, so it’s more predictable. Cost sensitivity tip: If money is tight, start with Make for heavy workflows or look at alternatives like Pabbly Connect or Integrately (they often have lifetime deals). But also consider your own time – Zapier might save you headaches with its ease. Many creators mix and match: e.g. using Zapier for simple but critical integrations and Make for large-volume data processing.
.png)
- Project & Time Management: Solo ops also means managing your own schedule and tasks. Reclaim AI is an AI calendar assistant that automatically blocks time for your tasks around your meetings, helps you reschedule if you slip, and optimizes your day. It’s like having a personal scheduler. This ensures that even as you automate external stuff, you personally don’t drop the ball on creating content or following up where needed. Taskade AI is another tool to consider – it merges note-taking, task management, and AI ideation. For example, you can outline your content plan in Taskade and use AI to brainstorm titles or steps. It keeps you organized and can generate content outlines or emails from simple prompts. While not directly part of the customer-facing automation, these help streamline the backend ops of being a creator.
- Influencer Marketing & Collaboration: As you grow, you might collaborate with other creators or do influencer partnerships to promote your products. Influencity is an AI-powered influencer marketing platform that can help identify the right influencers and manage campaigns. If one of your strategies is, say, an affiliate or referral program, a tool like Influencity could automate finding and managing those relationships (like tracking who brings sales). It’s more of a nice-to-have for a solo creator unless collaborations are a big part of your strategy. But worth noting as part of the broader landscape of AI in marketing ops.
- Specialized AI Utilities: Finally, some unique ones: taja.ai – this tool is fantastic if you create long-form videos and want to repurpose content. Taja can automatically chop your YouTube video into short clips or text posts for social media. Think of it as an agentic editor for video content; it watches your long video and picks out highlights to turn into an Instagram Reel or a tweet, etc. This can feed the top of your funnel (Stage 1) by giving you more content output without extra effort. Blaze AI (mentioned earlier) also overlaps in content creation and planning. Zapier’s AI tools (like AI Actions, ChatGPT integration) can handle a lot of little tasks – from writing personalized bits of text, categorizing data, drafting responses, etc., within a workflow. Keep these in mind as you build. Often the best stack is a core of 3-5 tools well-connected: e.g., “Instagram + ManyChat + Zapier + ConvertKit + Teachable + Circle” could be one creator’s stack, and each automation stage happens across those. For another it might be “TikTok + LinkDM + Google Sheets + MailerLite + Discord + Gumroad”. Tools will vary, but the principles carry over.
Logging Failures and Continuous Improvement
We touched on failure logs earlier, but let’s expand: No automation runs 100% perfectly forever. APIs change, a platform might have downtime, or simply a user does something unexpected (like enters an emoji where your parser expects text). It’s important to set up a system for catching and fixing these issues:
- Regularly review your automation logs: Make it a monthly (if not weekly) habit to glance at your Zapier Task History or Make Scenario runs. Look for any errors. Zapier will show tasks that errored out with a red indicator. Investigate why – maybe an app wasn’t connected properly or a field came in blank causing an error. Fix it and replay the task if needed. In Make, check the execution history and any error notifications.
- Use built-in notifications: Set up error notifications where available. For instance, Zapier can email you if a Zap turns off due to errors. In Make, you can have a custom error handler route that for example sends you an email with the error details whenever something fails. It might be a bit technical to set up, but even without that, the email from Zapier or Slack alert can be a lifesaver. It’s better to know an automation didn’t run as expected rather than silently missing out on leads or customers getting stuck.
- Keep a “failure log” document: This is a tip for being your own ops engineer: maintain a simple Google Doc or Notion page where you note down any failures that occurred and what you did to fix them. Over time, you build a knowledge base of your system’s weak points or tricky bits. For example: “03/12/2025 – Discord invite Zap failed; fix: needed to regenerate invite link. Solution: updated Zap step with new link.” This helps if a similar issue happens again. It also is useful if you ever outsource or delegate this in the future; someone can quickly see past issues.
- Continuous improvement via feedback: Your automations will benefit from real user feedback too. If people keep asking a certain question that your bot isn’t handling, consider updating the flow to cover it. If you see users dropping off at a certain email in your sequence (low click rate), maybe rewrite it (you can even A/B test email copy with some email systems, or just try a new version – an AI copy tool can help brainstorm more engaging angles). If your community invite uptake is low, maybe the invite needs to be more enticing or maybe that channel isn’t ideal – you could experiment with a different platform or method. The idea is: treat your automated funnel as a living system. Just like you’d tweak your content strategy by seeing what videos perform well, tweak your automation by observing where conversion might be lagging or issues arising. It’s an iterative process.
Remember, the goal of all this automation is not to remove the human element entirely, but to amplify your ability to provide a great experience. So monitor how people are flowing through these stages. Look at open rates, click rates, response rates. You might find, for example, that your Stage 1 DM gets tons of engagement but few move to Stage 2 (maybe the step to provide email is too soon – you might adjust the bot script to warm them more before asking). Or Stage 3 checkout might see drop-offs (maybe the checkout page was confusing – test a simpler one or ensure mobile-friendliness). Each stage is like a link in a chain; periodically check each link.
The Rise of AI Agents and Autonomous Workflows
.png)
A bit of future-gazing that’s relevant now: agentic workflows. We’ve mentioned Zapier and Make’s AI Agents. There’s also buzz about tools like AutoGPT, BabyAGI, etc., which are essentially AI programs that can think and act through steps autonomously given a goal. In a creator context, you might wonder, “Can I have an AI agent that manages my YouTube channel or runs my marketing ops while I focus on content?” We’re getting there!
For example, an AI agent to manage a YouTube channel could theoretically:
- Analyze your video performance stats (using YouTube API via Zapier).
- Identify which topics or keywords (with help of vidIQ data) are trending or underperforming.
- Recommend or even draft video titles, descriptions (with SEO in mind, maybe using Surfer SEO guidelines).
- Schedule your video releases at optimal times (with a tool like Vista Social or directly through YouTube’s scheduler via API).
- Respond to some comments or FAQ comments using a friendly tone (here caution: you’d need a good filter to avoid the AI saying something off-brand – better to have it draft and you approve).
- Post updates about the video to other platforms (tweet about it, share on Facebook, etc., which could be handled by something like Ocoya or Zapier multi-post).
Now, building such an “AI manager” completely hands-off is complex, but you can piece together parts of it with our toolkit:
- Use Zapier AI or Make AI to do analysis (e.g., a Zapier workflow that every week compiles your video stats and asks GPT to give you a summary and suggestions – delivered to your email).
- Use vidIQ’s recommendations combined with an AI writing tool to plan your next title.
- Have Reclaim AI block a slot in your calendar to film the next video when data suggests it’s time.
- Use Make to auto-post your video announcements across socials when you upload a new video (with different captions per platform, possibly AI-tailored).
- And yes, set up a Zapier Agent or GPT-based bot to handle certain repetitive queries like “When’s your next video?” or “What camera do you use?” by auto-replying with a friendly pre-written answer.
The point is, be on the lookout for areas in your workflow where an AI agent could take over a multi-step process. If you find yourself doing a routine set of tasks in a sequence often, see if you can automate the whole chain. Today it might still require stringing multiple zaps together, but the trend is moving towards giving an AI a goal and letting it figure out the steps. We’re in the early days of that, but tools like Zapier’s new “Canvas” and “Natural Language Actions” hint at a near future where you might just say: “Every week, plan and promote my blog post on all channels” and the AI-driven system does it.
However, word of caution: Always test and supervise new “agents” on small stakes before trusting them fully. Think of them like a new intern. At first, you check their work, give feedback, and once proven, you grant more autonomy. For instance, have an AI agent draft your newsletter but you approve it for a while. If it’s consistently good, maybe you start letting it auto-send a section or two.
By incorporating these advanced tools thoughtfully, your solo creator business starts to look and run like a tech-enabled studio. You can accomplish in a day what used to take a team weeks, all while keeping the authenticity and personal touch that being a creator is all about.
FAQs
Yes—because they buy you time and recover revenue you’d otherwise miss. Even offloading five hours of repetitive tasks per week frees about twenty hours a month to create content, rest, or market your work. A basic stack might cost $50–$100 a month, but that’s cheaper than hiring a virtual assistant and can easily pay for itself if the time saved lets you publish extra content, capture leads faster, or follow up on sales automatically. Track the time you reclaim and the extra revenue or audience growth it generates; most creators see a positive return quickly.
Automations act like gentle, timely nudges. If someone hasn’t logged in or opened emails for a while, a triggered “we miss you” message with fresh highlights can pull them back. Before a subscription renews, an automated reminder that showcases new features reduces cancellations. In a community, a bot can tag quiet members and invite them back into the conversation, while instant autoresponders acknowledge support requests so no one feels ignored. These personalized, timely touches make people feel seen and valued, which is the best defense against churn.
To automate Instagram DM sales, use an Instagram-approved chatbot tool (such as ManyChat or MobileMonkey, which integrate with IG DMs) or a social suite like Vista Social that offers DM automation. First, define a trigger – for example, when someone DMs you a specific keyword (like “INFO” or “BUY”), or when someone replies to your Story. Then, create an automated conversation flow: the bot responds instantly with the info or link promised (e.g., a product link or a question to engage them further). You can include quick-reply buttons in IG (e.g., “Yes, I’m interested” vs “Not now”) that the user can tap, and branch the conversation accordingly. To actually make sales, integrate a payment link or checkout right into the chat flow. ManyChat allows adding a Stripe checkout, so a user could complete purchase without leaving the Instagram chat. If that’s not available, the bot can drop a link to a mobile-friendly checkout page. Finally, ensure the lead’s info is captured – ask for their email to send a receipt or bonus, and tag them in your CRM (via a Zapier connection).
Great question – compliance is crucial when automating user data. To stay GDPR-compliant and respectful of privacy: First, always obtain consent when capturing personal data. For example, if your Instagram bot asks for an email to send a freebie, that’s fine (the user is voluntarily giving info for a specific purpose). But if you plan to also add that email to a newsletter, be clear about it: e.g., “I’ll email you the guide and occasional creator tips – you can unsubscribe anytime.” You may even set up a checkbox or a follow-up question “Do you want to subscribe to my newsletter?” in the chat flow. Under GDPR, you should only send marketing emails to people who opted in. Second, store data securely. Using reputable platforms (like ConvertKit for email, or HubSpot, etc.) usually covers this, as they are GDPR-compliant themselves. If you’re piping data through Google Sheets or Airtable, make sure those are private and secure. Avoid emailing yourself spreadsheets of user data or other sloppy practices that could leak info. Third, provide a way for users to request or delete their data. This can be as simple as honoring unsubscribe requests promptly (your email tool should handle unsubscribes automatically). And if a user DMs “STOP” or “DELETE”, make sure your bot or you manually remove them from any automation and do not contact them again.
AI agents can’t replace you as the creative heart of your YouTube channel, but they can certainly assist with many management tasks. Think of an AI agent as a smart assistant that can perform tasks autonomously when set up properly. For YouTube, an AI agent (using tools available in 2025) can: research and suggest video ideas based on trending topics or your channel analytics, generate SEO-optimized titles, descriptions, and tags (leveraging tools like vidIQ or TubeBuddy data combined with GPT-4’s language skills), and even help with content planning (e.g., creating an outline or script draft for your video using your past content style as a guide). After you upload a video, an AI agent could automatically promote it across other channels – for example, generate a Twitter post, a LinkedIn post, an Instagram story, etc., all with tailored captions (using something like Predis.ai or Ocoya behind the scenes). Agents can also help with comment management: you could have an AI system that scans comments for common questions or negative sentiment. Simple questions (like “what camera do you use?”) might get an instant auto-reply with a pre-written answer. More complex ones could be flagged for your personal response. Additionally, AI scheduling assistants (like a Reclaim AI) can block time on your calendar to engage with your community or work on new scripts, ensuring you maintain consistency.
In 2025, the top no-code automation tools for content creators include Zapier and Make.com for connecting apps and building workflows, ManyChat or Vista Social for automating DMs and social media tasks, and AI-driven tools like Blaze AI or AdCreative.ai for content creation. Zapier is great for beginners due to its simplicity and huge app library, while Make offers powerful scenario building and is cost-effective for large numbers of tasks. For content and marketing, creators love Ocoya (creates and schedules social posts with AI), Surfer SEO (optimizes written content to rank higher), vidIQ (boosts YouTube SEO and strategy), and Taskade AI (organizes tasks and brainstorms ideas). The “best” tools depend on your needs, but starting with a core of Zapier/Make (automation backbone), a social media scheduler (Vista Social, etc.), and an email platform with automation (MailerLite, ConvertKit, etc.) is a solid foundation. From there, add specialized AI tools like AdCreative.ai (for ads) or taja.ai (for repurposing videos) as needed. All without writing a single line of code.
Most platforms give you a built‑in task log—Zapier calls it Task History, Make (Integromat) calls it the Execution Log—where errors are clearly flagged. Turn on failure alerts so the system emails or messages you whenever a workflow stops or a step errors out. When something does fail, open the workflow in edit mode, replay or retest the bad run, and add simple safeguards such as filters, default values, or refreshed app connections. A quick spot‑check of your logs once a week, plus those real‑time alerts, will catch almost every issue before it becomes a headache.
Both Zapier and Make (formerly Integromat) are excellent no-code automation platforms, but they differ in pricing and approach. Zapier is known for its ease of use and huge number of integrations (7000+ apps). It has a free plan for small usage, but the paid plans can get expensive as you scale – e.g., ~$20/month for 750 tasks, $50/month for 2,000 tasks, etc. Make.com, on the other hand, offers more actions for the price – e.g., $9/month for 10,000 operations, which sounds very generous. However, Make counts both triggers and actions as “operations”, and if you have complex scenarios, those ops can add up. For a solo creator on a tight budget, Make can give more bang for your buck if you spend time optimizing your scenarios. Its visual scenario builder is powerful (you can branch, iterate, and do advanced logic), so if you’re somewhat tech-savvy you can achieve a lot for little cost. Zapier is more plug-and-play and might save you time in setup, but you might hit task limits quicker if you automate heavily.


.png)


