Follow this step-by-step guide to connect your forms, automation tools, and CRM for an entirely automated funnel that saves you time.
You’re a creator with a million things to do, and manual busywork is dragging you down. Collecting leads, emailing each person back, adding them to your CRM—it’s a time sink and prone to mistakes. You might wonder how to automate your entire funnel so that none of your hard-earned prospects slip through the cracks.
Think about the frustration of copy-pasting email addresses at midnight or losing a potential client because you forgot to follow up. Every minute spent on tedious form entries and data transfer is a minute taken from creating content, coaching clients, or growing your business. It’s overwhelming wearing all these hats, and the grind can kill your creative spark.
The good news? You can offload this grunt work to technology. In this guide, we’ll walk you through setting up an automated funnel step by step. By the end, your form data will flow directly to your email list and CRM, and even trigger AI-powered replies—saving you time, keeping you organized, and letting you focus on what you love doing.
Table of Contents
- Quick Snapshot
- Your Tool Options & Setup Checklist
- Step-by-Step Guide
- Create Your Online Form
- Connect Your Form to an Automation Platform
- Add a Step to Update Your CRM
- Use AI to Craft a Response
- Send an Automated Email to New Leads
- Set Up Notifications and Confirmations
- Test Your Automated Funne
- Refine and Scale Your Workflow
- Pro-Level Power-Ups
- Avoid These Funnel Automation Mistakes
- Time-Saving Automations & Must-Follow Rules
- FAQs
Quick Snapshot
TL;DR: Set up an online form to capture leads, connect it with a no-code automation tool to send data to your CRM, and use AI to instantly email back new prospects. Your funnel runs itself while you focus on creating!
- Build Your Form (~10 min): Use a form builder to create an engaging, mobile-friendly form for collecting leads or client info.
- Connect the Automation (~5 min): Link your form to c, Make, or n8n so a new submission instantly triggers your workflow.
- Send to CRM (~7 min): Automatically pipe form data into your CRM (like HubSpot) or email list to keep your contacts organized.
- Auto-Reply to Leads (~10 min): Let an AI draft and send a personalized email (or message) to the respondent as soon as they hit "Submit."
- Notify and Monitor (~3 min): Set up an alert (email or Slack) for yourself for every new lead so you never miss a beat.
- Test & Tweak (~5 min): Do a dummy run through your funnel to ensure each step works, then refine as needed.
Your Tool Options & Setup Checklist
Before diving in, make sure you have the right tools at hand. Here’s a quick checklist of recommended tools for forms, automation, and CRM/email. We’ve listed each tool’s starting price, whether it offers a free plan or trial, and its primary purpose:

Pro Tip: If you’re just starting out, take advantage of free plans and trials. For example, HubSpot’s free CRM can handle basic contact management, and Zapier’s free tier is often enough for low-volume automation. As your audience grows, you can upgrade gradually.
Next step: match your workflow to the perfect form builder.
Read our companion guide — “Ultimate Form Strategy for Creators: Capture, Nurture, Profit (2025).”
- Use-case picks (lead capture, quizzes, client intake, payments) with tools like Typeform, involve.me, Jotform, Paperform, Fillout, Tally, LeadGen
- Conversion benchmarks + quick fixes for drop-off and low completion
- Automation recipes (ESP/CRM sync, tags & scoring, PDFs, Slack alerts) via Zapier/Make
- Compliance & UX checklist (GDPR/CCPA, spam protection, mobile, accessibility)
- Pricing breakdown + Creators Kit deals you can stack
- m3-minute Loom walkthrough if you’re pressed for time
Step-by-Step Guide
1. Create Your Online Form
Every funnel starts with a form. Pick your favorite online form builder (like Typeform, Jotform, or Paperform) and create a form to capture your leads. Keep it simple and on-brand: add your logo, use a friendly tone, and only ask for information you truly need. For instance, if you’re a freelance designer, your form might collect a prospect’s name, email, project details, and budget. A coach or consultant might include a “How did you hear about us?” field to track what’s working.
Make sure your form is mobile-friendly and easy to complete. Most modern form builders are drag-and-drop, so you can build an interactive form without writing a single line of code. Consider whether a multi-step form makes sense for you—sometimes breaking questions into steps can boost completion rates by not overwhelming the user.
Pro Tip: Use a template to save time. Form builders often have pre-made templates for things like coaching applications, newsletter sign-ups, or client questionnaires. Grab one that fits your use case and tweak it. This way, you’re not starting from scratch, and you’ll get ideas for what to ask from forms that already convert well.
2. Connect Your Form to an Automation Platform
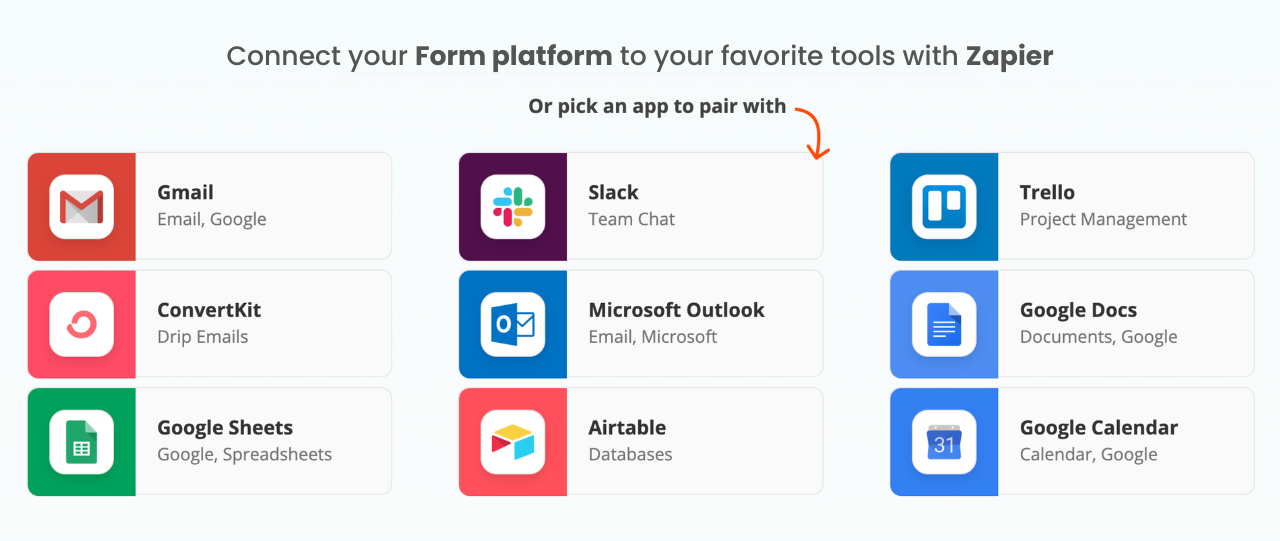
Once your form is ready and published (whether it’s embedded on your website or shared via a link), it’s time to connect it to your automation tool. Log in to a platform like Zapier, Make, or n8n
—these are the bridges between your form and all the other apps in your funnel. In Zapier, you’ll create a “Zap”; in Make, it’s called a “Scenario”; in n8n, it’s a “Workflow.” The concept is the same: you set up a trigger and then actions.
Create a new workflow and set the trigger as your form submission. Each form tool is different, but most integrate directly: for example, choose “Typeform” as the trigger app and “New Form Response” as the event. If your form tool doesn’t have a direct integration, you can often use a webhook catch—most form builders let you send submissions to a webhook URL provided by the automation platform.
At this step, you’ll likely be asked to connect your form account (e.g., log in to Typeform through Zapier to give permission). Once that’s set, test the trigger. Submit a test entry on your form and verify that your automation platform detects it. This ensures the connection is live.
3. Add a Step to Update Your CRM
With the trigger in place (your workflow now recognizes when a new form entry comes in), your first action will usually be adding that lead’s info to your CRM or email list. This way, all your prospects get logged without you lifting a finger. In your automation workflow, add an action step like “Create Contact” or “Add Subscriber.” For example, choose HubSpot as the app and select “Create Contact,” or choose your email marketing tool (if you’re not using a full CRM yet) and select “Add to List.”
Map the form fields to the CRM fields: you’ll match things like Name, Email, Company, etc., so the data lands in the right spot. After mapping, run a quick test of this action. The automation tool will take the sample data from your form and attempt to create a contact in your CRM. Check your CRM to confirm that the test contact showed up correctly (maybe under a “Test” name you used).
This step is gold for solo entrepreneurs: from now on, every lead from your form will be neatly stored, tagged, or categorized in your system. No more digging through emails or spreadsheets to find that person who contacted you last week!
Try This Experiment: If your CRM allows custom fields, try capturing something unique from your form. For example, if you ask “What services are you interested in?”, map that to a custom field in the CRM. You can use that later to segment leads or personalize follow-ups. It’s a small step that can pay off with more targeted marketing down the road.
4. Use AI to Craft a Response
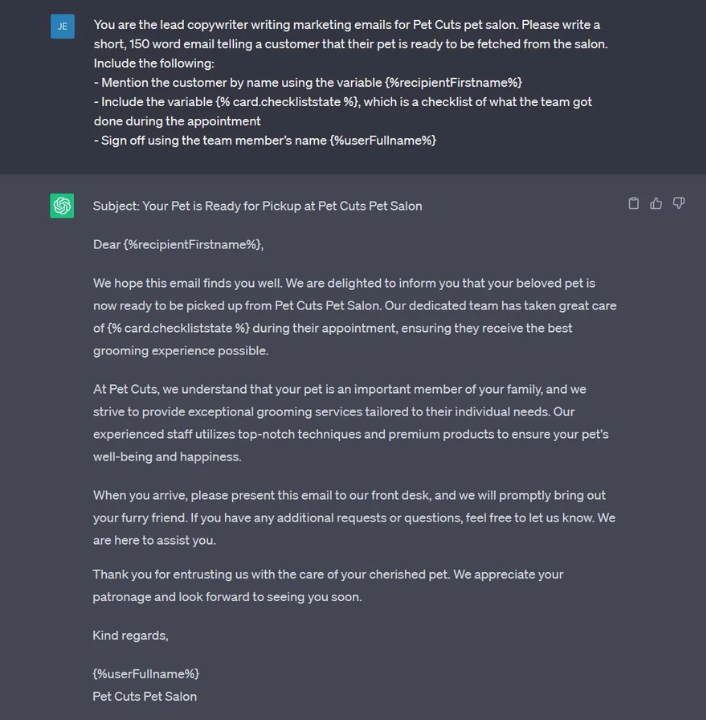
Here’s where the 2025 magic happens. Instead of writing a generic “Thank you, we’ll be in touch” email for every lead, you can have an AI draft a personalized reply instantly. In your automation sequence, add a step with an AI integration. Zapier, for instance, has a built-in ChatGPT (OpenAI) action now. Tools like Make or n8n can connect to OpenAI’s API as well.
Set up a prompt that tells the AI what to do. For example: “You are an assistant for a business coach. A new lead just filled out our form. Their name is {{Name}} and they are interested in {{Service}}. Draft a friendly 100-word email thanking them for reaching out and telling them I’ll follow up within 24 hours. Include one tip about {{Service}} to show value.”
The placeholders like {{Name}} and {{Service}} will be filled with the actual answers from your form submission. When a new entry comes in, the AI will generate a unique reply based on the lead’s info. How cool is that? It’s like having a virtual assistant crafting custom messages for each lead.
One thing to keep an eye on: set expectations in these AI-generated emails. Since it’s an automated first touch, it can say something like “I (or my assistant) will get back to you soon with more details,” so the lead knows what’s next.
Pro Tip: Test the AI step with different scenarios. Feed it a few sample submissions (most automation tools let you replay the workflow with different data) to see the kind of emails it writes. Tweak your prompt until you’re happy with the tone and content. A slightly adjusted prompt can be the difference between a robotic-sounding message and a genuinely warm, on-brand note.
5. Send an Automated Email to New Leads
Now that you have a nicely drafted email (either via AI or a pre-written template), let’s actually send it out. Add another action in your automation workflow to handle sending the email. You have a couple of options here:
- Use an Email Service: If you have an email marketing service connected (like SendGrid, Mailchimp, or even HubSpot’s email tool), you can use an action like “Send Email” and plug in the AI-generated text as the body.
- Use Gmail/Outlook: If you prefer, connect your Gmail or Outlook and have the automation send an email directly from your account. Zapier has a “Send email via Gmail” action, for example.
- Some form builders (like Jotform or Typeform) can send a simple autoresponder email on their own. However, those are usually less personalized. We’re aiming for a more robust setup here with your automation platform.
When setting up this email action, you’ll write the subject line (e.g., “Thanks for reaching out, {{Name}}!” where {{Name}} is the person’s first name from the form). Then, for the body, insert the content from the previous AI step or your template. Be sure to include your reply-to address correctly (usually your own email), so if the lead replies to this automated email, it goes to you.
Also, consider adding a personal touch or useful link: if you promised a free PDF or a scheduler link in the form, include it in this email. The goal is to make the lead feel taken care of immediately.
6. Set Up Notifications and Confirmations
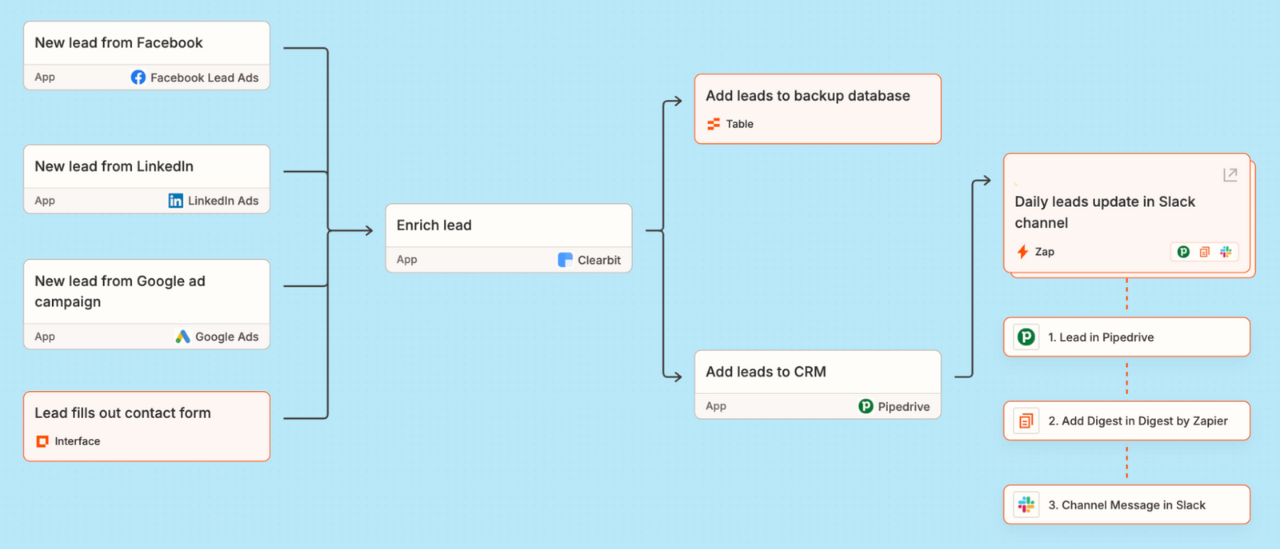
By now, your new lead is getting a prompt reply and their info is in your system. But what about you? It’s a good idea to notify yourself (or your team) whenever a new submission comes through. You don’t want automation to mean you lose the personal touch completely—especially for high-value leads that might warrant a personal follow-up or a welcome call.
Add an action for a notification. This could be as simple as sending yourself an email with the lead’s details, or a Slack message if you use Slack, or even a notification in your project management tool. For example, Zapier’s “Email by Zapier” can shoot off a quick email to your inbox saying “New Lead Alert: [Name], interested in [Service].” Or, if you prefer text messages, use an SMS action (there are services like Twilio for that) to get an alert on your phone.
If your CRM sends its own notifications for new contacts, you might skip this. But many solo business owners find it handy to have a custom alert with key info. It’s like a little victory ping every time someone new joins your funnel!
Another thing to set up is a confirmation page or message right when the form is submitted. Most form builders let you customize the “Thank You” screen. Use that space to reassure the person. For example, “Thanks for reaching out! Check your email for a message from us, and we’ll follow up within a day.” This immediate feedback plus the follow-up email (from Step 5) makes your new lead feel valued and informed.
7. Test Your Automated Funnel
Before you call it a day, test everything from end to end. This step is crucial and will save you headaches later. Fill out your own form as if you were a potential client or subscriber. Use a different email address than your main one (so you can check if the automated email lands properly).
After submitting:
- See if the thank-you page/message appears as expected.
- Check your CRM for a new contact entry with all the right details.
- Look for the automated email in the inbox of the test address you used. Does it arrive? Does it look good on both desktop and mobile? All the personalization tokens (name, etc.) should be in place.
- Confirm you received your internal notification (email, Slack, etc.). It should have the info you want at a glance.
If anything is off—maybe the name didn’t populate in the email, or the CRM field mapping got mixed up—go back into the automation settings to fix it now. It’s normal to tweak and run a couple more tests. Better you catch any hiccups than a real lead does.
Consider asking a friend to also test the funnel, or test on a different device/browser, especially for the form usability. You want the process to be smooth as butter.
Try This Experiment: Create a “dummy lead” in a worst-case scenario. Enter deliberately weird or edge-case data in your form (like extremely long names, or special characters, or an empty required field if your form allows it somehow) to see how your system handles it. Does the email still send nicely? Does the CRM capture it? Testing extremes can reveal hidden issues, like if your AI email tries to use a person’s name and they typed “asdf” as their name—maybe have the AI email use a more generic greeting if the name field seems junky. These details keep your funnel running reliably.
8. Refine and Scale Your Workflow
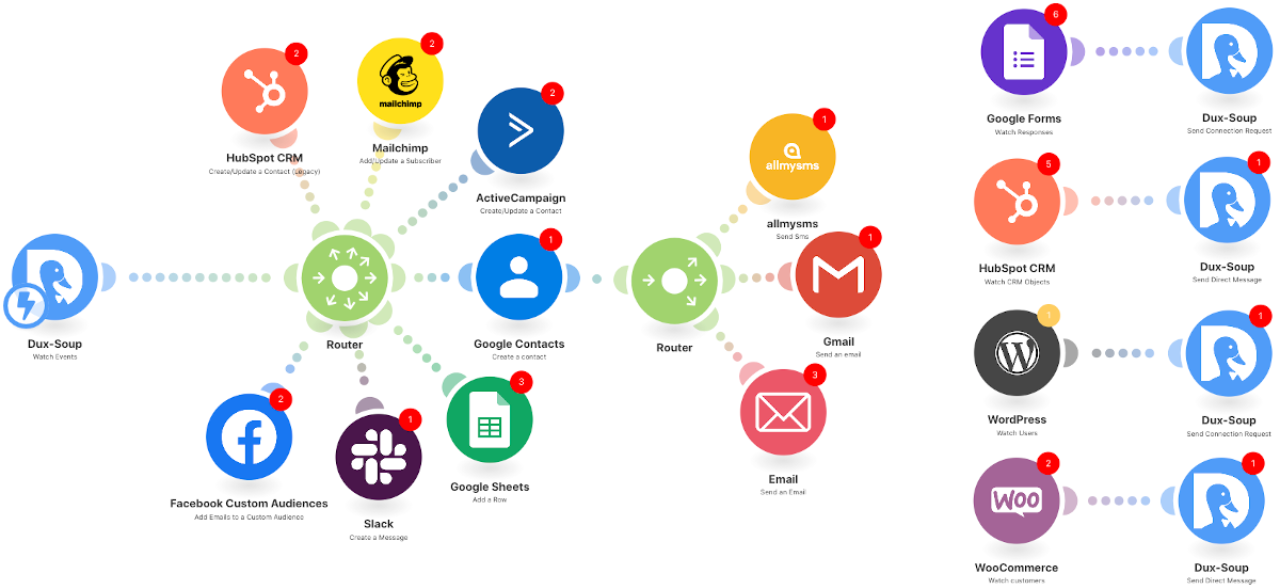
Congratulations, you’ve built an automated funnel! Now it’s time to refine and consider scaling it up. Automation isn’t a “set it and forget it” thing—it’s more like “set it and improve it.”
After a week or two of running your funnel, take a look at the results:
- Are people opening your automated emails? (If you use an email tool that shows open rates, check them out.)
- Are leads responding or booking calls after the AI-driven reply? If not, maybe tweak the content or tone of that email.
- Did you encounter any hiccups, like a lead who submitted but their info didn’t show up where it should? Investigate and fix those ASAP.
Refine the workflow by adding filters or branches if needed. For example, if your form has a “How urgent is your need?” question and someone answers “ASAP,” you could branch that automation to not only email them but also text you an alert labeled “Hot lead – reach out personally within 1 hour.” That way, you can scale personal attention where it’s most needed.
Scaling the workflow might involve connecting more tools. Perhaps now you want to add an appointment scheduler into the mix—after the AI email, you could send them a Calendly link automatically. Or if you start running webinars, you might integrate those sign-ups into the same CRM via similar automations.
Each new piece you add can still plug into the core framework you built: trigger (capture lead) → action (put in CRM, send emails) → follow-ups. By layering on more steps or conditions, you can automate an entire customer journey from the moment they fill a form to the moment they become a client, all while you’re focusing on delivering your actual service or content.
Pro Tip: Document your funnel workflow in a simple flowchart or checklist. As you refine it or if you step away for a bit, having a visual map helps you or any team member quickly understand how everything is connected. It doesn’t need to be fancy—just outline each trigger and action. This also makes it easier to spot opportunities for new automations or to debug if something goes wrong.
Pro-Level Power-Ups
Once you’ve mastered the basics, you can really start having fun with advanced automation. Here are some pro-level power-ups—actions you can implement to supercharge your funnel, along with the benefits they bring:
Automate Follow-Up Sequences → Nurture Leads Hands-Free
Why stop at one email? Set up a drip sequence to automatically follow up over the next few days or weeks. Benefit: Your leads continue hearing from you (with valuable tips, case studies, or offers) without you manually tracking who to email when. This keeps them warm and increases the chances they’ll convert when they’re ready.
Trigger Calendar Invites → Book Meetings Without Back-and-Forth
Use your form responses to trigger a calendar invite or send a booking link. For example, if someone indicates they want a consultation, automatically email them your Calendly link or even create a tentative Google Calendar event. Benefit: You eliminate the endless email tag to schedule meetings and can wake up to discovery calls magically appearing on your calendar.
Implement Lead Scoring → Focus on Hot Leads First
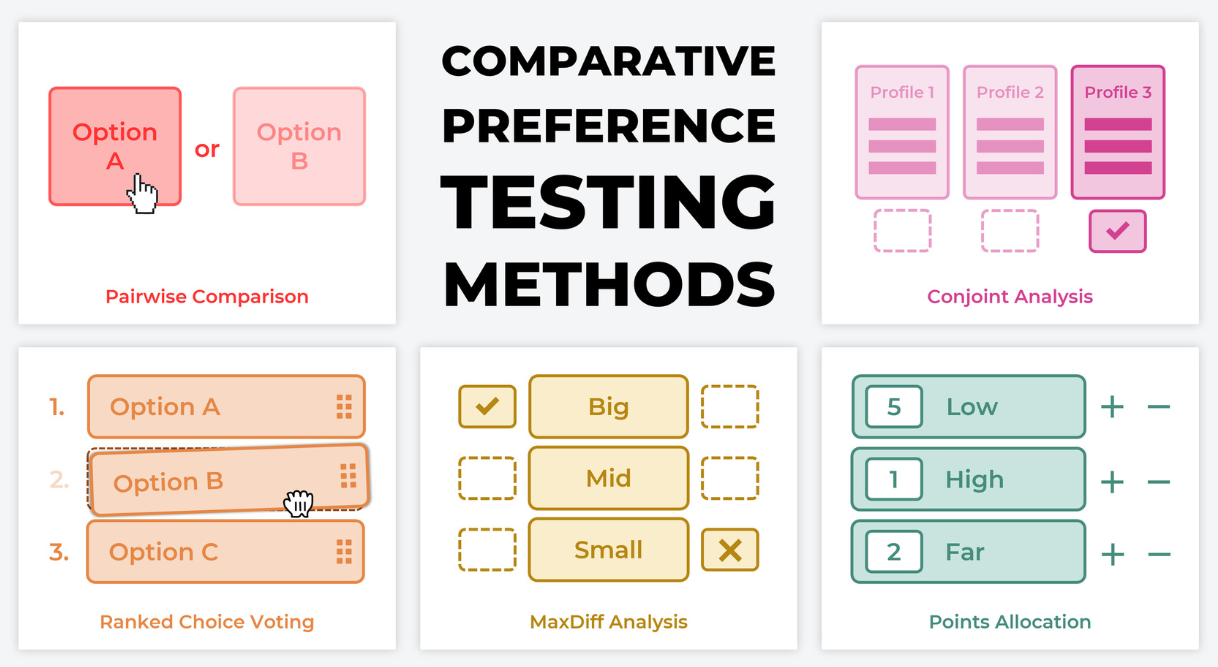
Goal: send real buyers to you fast; keep everyone else on helpful nurture—automatically.
1) Ask just what predicts $$
Include 5 quick fields in your form:
- Budget (range)
- Timeline (ASAP / 2–4 weeks / later)
- Role (Decision-maker / Research)
- Use case (picklist tied to your offers)
- Location / Time zone (for routing + scheduling)
(Add hidden fields for UTMs so you know where they came from.)
2) Simple score (copy/paste)
- Budget: <$500 0, $500–$2k +5, $2k+ +10
- Timeline: ASAP +10, 2–4 weeks +6, later +2
- Role: Decision-maker +8, Research +2
- Use case: High-fit +6, Other +2
- Location: In-service region +5
Tiers:
- 0–9 = Cold → tag
Cold, add to tips/newsletter - 10–19 = Warm → tag
Warm, send case study + soft CTA - 20+ = Hot → tag
Hot, create task/deal, DM you in Slack, auto-send Calendly link
3) A/B test the questions (super light)
- Make Form A (Budget + Timeline) and Form B (Team size + Revenue band).
- Split traffic 50/50 (use involve.me A/B or a page split via VWO/Convert).
- Tag each contact with
Form:AorForm:B. After 2–4 weeks, compare booked calls / win rate / deal value. Keep the questions that best predict revenue, not just completions.
4) 5-minute wiring (Zapier example)
- Trigger: New submission (Typeform / involve.me / Outgrow / Jotform / Fillout).
- Score: Zapier Formatter → Numbers (add the points) or use HubSpot Lead Scoring if you’re on HubSpot.
- Upsert contact: HubSpot / Pipedrive / ConvertKit with tags like
Score: 24,UseCase: Coaching,Geo: EU. - Branch:
- Hot: create Task/Deal, Slack DM + SMS, send Calendly email.
- Warm: start 3-email mini-nurture tailored to use case.
- Cold: add to weekly tips list.
- Log source: store UTMs and
Form:A/Bon the contact for later reporting.
No CRM yet? Use Google Sheets (row per lead) + Gmail to send the right email based on the score. Add Calendly link only for Hot.
5) Tiny tips that matter
- Make “Budget” optional and add “Prefer not to say.” Explain why you ask (“to recommend the right plan”).
- Review quarterly: Does your score correlate with booked revenue? Tweak points or questions.
- Keep it human: first reply can be automated, but for Hot leads, follow with a short personal loom/voice note.
Payoff: your form self-segments, your CRM fills with useful tags, Hot leads hit your calendar fast, and everyone else gets relevant nurture—without extra work.
Add SMS Follow-Ups → Increase Multi-Channel Engagement
Don’t rely on just email. Integrate an SMS step for certain triggers (e.g., a lead checks a box that they want texts, or high-scoring leads automatically get a text). A service like Twilio or ClickSend can send a pre-written text to say, “Hey {{Name}}, saw you reached out—check your email for details from me!” Benefit: Reaching leads on multiple channels (email and SMS) can boost engagement rates, as some people respond faster to a quick text.
Use Conditional Logic → Personalize the Customer Journey
Make your funnel smart. Add conditional paths in your automation: e.g., if a lead says they’re interested in Service A, send them sequence A; if they chose Service B, send sequence B. Many automation tools allow “if/else” logic or branching workflows. Benefit: Each lead gets content and follow-ups that match their interests, which means higher relevance and better conversion odds. It’s like having multiple funnels running in one.
Avoid These Funnel Automation Mistakes
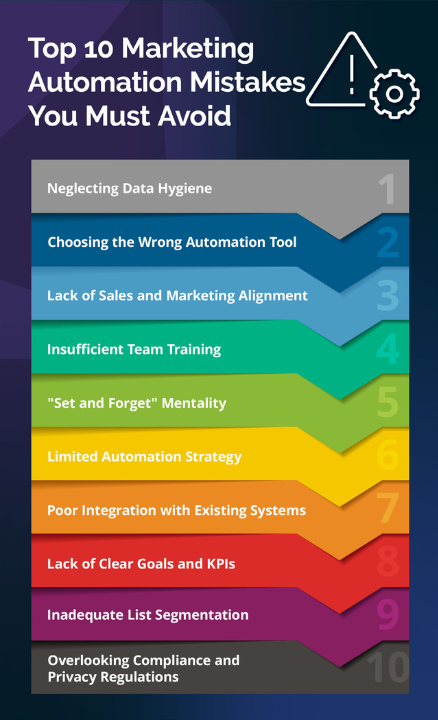
Even seasoned creators slip up—make sure you avoid these common funnel automation mistakes so your system runs smoothly:
- Skipping tests: Not testing your funnel could lead to broken links or missing emails. Fix: Always do a few test runs and QA before sending real people through.
- Too impersonal: Over-automating without personal touch can feel robotic. Fix: Personalize messages with names or details, and step in personally for high-value contacts.
- Ignoring data privacy: Collecting emails without permission or not following GDPR/CCPA rules can get you in trouble. Fix: Always include an opt-in checkbox and a link to your privacy policy on forms.
- No update plan: Funnels can break over time if you “set and forget.” Fix: Schedule a quarterly check-in to update email content, check integrations, and ensure everything still works with any software updates.
- Overwhelming the lead: Sending too many automated messages too fast can scare people off. Fix: Space out your follow-ups reasonably and ensure each touchpoint adds value, not just asks for a sale.
Time-Saving Automations & Must-Follow Rules
Building on your funnel, here are a couple of favorite automation recipes to save even more time, plus essential rules you should always follow when automating:
Quick Automation Recipes:
Clean capture & auto-tag (no junk, no duplicates)
- Trigger: New form (Typeform / Jotform / Paperform)
- Actions: Verify email (ZeroBounce/Clearout) → Upsert contact in HubSpot / ConvertKit / Mailchimp / ActiveCampaign → add tags (e.g.,
Source: Website,Offer: Audit) - Tools: Zapier or Make + your ESP/CRM
- Payoff: Clean list, better deliverability, organized contacts from day one.
Instant, on-brand confirmation (AI that doesn’t feel robotic)
- Trigger: New form submission
- Actions: Use OpenAI step to draft a 100–120-word reply using form answers (tone: warm, helpful) → send via Gmail/Outlook or your ESP
- Tools: Zapier/Make + OpenAI + Gmail/ESP
- Payoff: Replies land in seconds; you look responsive without copy-pasting.
Rich Slack alert you can act on (not just a ping)
- Trigger: New submission
- Actions: Post a Slack message with key fields (budget, timeline, service) + buttons/links (“Open in CRM”, “Create task”)
- Tools: Zapier Slack (Block Kit), HubSpot/Pipedrive deep links
- Payoff: One click from alert to action; no digging through tabs.
Hot-intent fast lane (work the right leads first)
- Trigger: Answers contain “ASAP/this week” or Budget ≥ $1,000
- Actions: Create Deal in HubSpot/Pipedrive → assign owner → due date +2h → send Slack DM + SMS (Twilio/ClickSend) to you
- Tools: Zapier/Make + HubSpot/Pipedrive + Slack + Twilio/ClickSend
- Payoff: You call high-intent leads while they’re still warm.
Segmented nurture from quiz/choices (right message, right person)
- Trigger: Quiz result or key choice (involve.me / Outgrow / Typeform)
- Actions: Apply tags like
Beginner/Pro/Agencyin ConvertKit/Mailchimp → start matching sequence A/B/C → store score in CRM custom field - Tools: Zapier/Make + your ESP/CRM
- Payoff: Automatic personalization without manual sorting.
Didn’t book? Smart nudge with time slots
- Trigger: Form says “consultation,” no Calendly/Cal.com booking after 24h
- Actions: Send short follow-up with 3 inline time options (Calendly magic links) → if no reply after 48h, send helpful resource (case study/FAQ) instead
- Tools: Zapier/Make + Calendly/Cal.com + Gmail/ESP
- Payoff: Gentle reminders recover missed calls without sounding spammy.
Must-Follow Rules:
- Consent first, always. Use a clear opt-in checkbox + link to your Privacy Policy. Store consent timestamp/URL in the contact record.
- Send what you promised. Map each form’s promise to its first email. If the form says “Free audit,” the email must deliver it or the next step to get it.
- Throttle and space messages. More than 2 messages in 24h feels spammy. Default cadence: instant confirmation → 24h value email → 3–5 day nurture.
- Fail gracefully. Add a “catch errors” path that pings Slack with the payload and the step that failed (e.g., CRM down). No silent drops.
- De-dupe everywhere. Use email as the unique key in CRM/ESP/Airtable to avoid “three records for the same person.”
- Minimize data. Don’t collect what you won’t use. Sensitive fields (DOB, address) tank completion and increase risk.
- Mobile first. Test every confirmation email and page on a phone. Buttons must be thumb-friendly, and forms should never require pinch-zoom.
- Log & review monthly. Keep a lightweight log (Notion/Airtable) of automations: purpose, owner, last test date. Review metrics (open, click, time-to-reply) monthly and prune what isn’t helping.
- Respect unsubscribes across systems. If someone opts out in Mailchimp, tag them “Do-Not-Email” in CRM via automation.
- Human override on high stakes. For deals above your threshold (you decide), route AI drafts to Drafts (not auto-send) so you can add the personal touch.
These tweaks turn your form into a self-running intake machine: clean data, instant routing, smart replies, and zero “who’s doing what?” confusion—so you can spend time creating, not copy-pasting.
FAQs
Yes. A form can capture emails for future sales or deliver an immediate upsell. Offer a freebie (lead magnet), then present a low-priced product or “tripwire” on the thank-you page. Even a small conversion rate funds ad spend and seeds your list with proven buyers—setting up larger sales down the line.
Google Forms is a completely free, super-simple form builder that’s part of the Google Workspace. Its strengths are ease of use and collaboration. It’s great for basic forms and surveys – you get a few question types, the ability to add images or videos, and it automatically collects responses into a Google Sheet. However, compared to the likes of Typeform, Jotform, etc., Google Forms has limited design and features. You can’t heavily brand it (there are modest color/theme options), and it doesn’t support things like payment integration, advanced logic (it has only simple “go to section based on answer”), or direct integrations beyond Google’s ecosystem. There’s also a somewhat generic look to Google Forms that many recognize. So, while Google Forms is excellent for quick, internal, or small-scale projects – and beloved for being free and unlimited – other form builders give you more polish and power. They offer things like custom styling, embedding on websites without Google branding, conditional logic, integrations with Mailchimp/CRM, and more sophisticated question types. In summary, Google Forms is different in that it prioritizes simplicity and ubiquity over customization. Use it for straightforward needs or when budget is zero; graduate to a more feature-rich tool when you need a professional touch or advanced capabilities.
Google Forms is the fastest true-free option—great for simple surveys but limited in design and logic. Creators who want a polished, branded look usually start with Jotform’s free plan (up to five forms, conditional logic, basic payments) or Typeform’s starter tier (conversational style, 10 responses/month). So: Google Forms for zero-cost basics; Jotform or Typeform when you need professional aesthetics without opening your wallet.
Yes, free form builders can be surprisingly powerful – but they often come with limitations you should be aware of. Many professional creators start with free plans from platforms like Jotform, Google Forms, or involve.me. For example, Jotform’s free version allows 5 forms and 100 submissions a month, which might be plenty for a new project. Google Forms is completely free and offers unlimited forms and responses, but it’s quite basic in design and features. Free tools are great for basic needs or testing ideas. As you grow, you might hit limits (like response caps or lack of certain integrations) and that’s when upgrading or moving to a paid plan makes sense. The good news: the core functionality (collecting data) is solid in free versions; your forms will still look professional, especially if you remove any obvious platform branding or keep it minimal. Many creators use free form builders for quite a while successfully. Just plan ahead for scale – if you anticipate hundreds of responses or need advanced features (payments, heavy logic, custom branding), a paid plan will eventually be worth it for a truly professional setup.
Good form builders come with features to boost conversions – the key is utilizing them. Here are a few ways: (1) Improved User Experience: A tool like Typeform increases engagement by showing one question at a time in a conversational format, which can prevent users from feeling overwhelmed. This often leads to higher completion rates. (2) Mobile optimization: ensure you choose a builder known for mobile-friendly forms – many people will respond on phones, so a smooth mobile form means they’re more likely to finish it. (3) Logic Jumps and Personalization: using conditional logic to skip irrelevant questions keeps the form shorter and more tailored for each person, which can reduce drop-offs. People are more likely to convert when the form feels relevant. (4) Progress Indicators: many form builders let you show a progress bar or steps (e.g., “Page 2 of 3”) – this can encourage users by telling them they’re almost done, improving completion chances. (5) Visual Appeal: a nicely designed form with images or a welcome message can set a friendly tone, making users comfortable and willing to submit. Tools like Paperform allow rich content, which can engage users (e.g., using an image for a multiple-choice option can increase clicks). (6) Trust Signals: some forms allow you to embed a small note about privacy or why you’re collecting data; coupled with a professional-looking design, this builds trust, and trust leads to conversions. (7) Integrations for Follow-up: While not directly affecting the immediate form fill, integrating your form with email marketing means you can quickly send a follow-up “Thank you” or incentive (like a freebie for filling out the form). This promise of quick reward can increase initial conversion and also nurture the relationship. In summary, form builders help conversions by letting you craft a form that is short, relevant, attractive, and seamless to complete. By leveraging these features (many of which are baked into the tools we discussed), you’ll likely see more people finish your forms and take the action you want.
Drag-and-drop means you can build your form by selecting elements (like text fields, multiple-choice questions, image blocks) and literally dragging them into your form layout where you want them. It’s a visual way to create forms without writing code. This matters because it makes form building accessible to everyone, even if you’re not techy. As a creator, you probably wear many hats – you might not be a programmer, and with a drag-and-drop interface you don’t need to be. You can focus on the content of your questions rather than technical details. Most modern form builders (Jotform, Typeform’s editor, etc.) are drag-and-drop or very visual in nature. This means you can see a real-time preview of your form as you build it, arrange things intuitively, and quickly make changes by dragging items around. It drastically speeds up the design process. In short, “drag-and-drop” is all about ease of use – it allows you to create and customize forms with a few clicks, making form building as simple as playing with building blocks.
Most builders have native connectors—log in, authorize, map fields, pick a list, done. If yours doesn’t, use Zapier (or Make) to trigger “New form submission → Add subscriber.” Five minutes of setup means every lead flows automatically into Mailchimp, ConvertKit, HubSpot, or any CRM you use.
A good starting point is to automate any task you find yourself doing repeatedly on a schedule. Common first automations include:
- Email responses – Set up auto-responders for frequently asked questions or a welcome email for new subscribers so everyone gets timely info without manual effort.
- Content publishing flow – Automate sharing your new content to all platforms (post once, promote everywhere).
- Lead capture follow-up – If you’re collecting emails via a form, automate the delivery of the lead magnet or thank-you message immediately.
- Social media posting – Schedule regular posts or use triggers like “new blog -> create social post” to stay consistent.
- Data backups – Save copies of your work (videos, posts, contact lists) automatically to cloud storage; it’s not glamorous but will save headaches.
Routine reports – For instance, get a weekly summary of your stats emailed to you (so you don’t forget to check analytics). Think about tasks that don’t require your personal touch and happen often – those are prime for automation. Even automating something that takes 5 minutes a day adds up to significant time saved over months. Start small, get comfortable with one or two simple zaps or workflows, then expand as you identify more drudgery in your day that could run on autopilot.








.png)


