
.png)
As a solo creator or small team, searching for the best video editing tools in 2025 can feel overwhelming. New apps promise AI magic and endless features, yet many creators end up overspending on subscriptions or struggling with tools that don’t match their skills. The result? Frustration, wasted time, and videos that never get finished.
We’ve all been there – sinking hours into an editing app that’s too complex, or hopping between “shiny new” tools that derail your workflow. Maybe you’re paying for software packed with pro features you never use, or stuck on a free app that slaps watermarks on your work. This mismatch not only drains your budget but also saps creative momentum. Every minute fiddling with the wrong editor is time not spent growing your channel or business.
It doesn’t have to be that way. The good news is there are a handful of standout video editing apps perfectly suited to creators like you. Whether you need lightning-fast AI shortcuts or a friendly mobile editor, we’ve got you covered. In this guide, we break down eight of the year’s top tools – highlighting their features, pros, cons, and ideal use cases – so you can confidently choose one that streamlines your process. Let’s cut through the noise and find the one video editor that will save you time, money, and creative headaches.
Top 8 Video Editing Tools for Creators (Quick List)
- CapCut – Free, cross-platform editor with advanced effects and AI tools.
- Veed – Online video editor known for auto-captions and ease of use.
- OpusClip – AI-driven tool to turn long videos into viral-ready short clips.
- InVideo AI – Text-to-video platform for instant marketing videos and more.
- Abyssale – Creative automation for bulk image/video generation with templates.
- Canva – All-in-one design tool with simple video editing and huge template library.
- Capté – Subtitle-focused editor to auto-transcribe, style, and repurpose video clips.
- Picsart – Mobile-first editor packed with filters, stickers, and AI tools for quick edits.
Top Video Editing Tools at a Glance
.png)
Next step:
upgrade your editing game to match your creative vision. Read our companion guide — “From First Clip to Hollywood-Level Post: Mapping the Ideal Editor for Every Creator Stage in 2025.”
• Editing benchmarks for each stage of your creator journey
• Tool and workflow recommendations that grow with your skills and audience
• Quick-read summary for busy creators
How to Choose the Right Video Editing Tool
With so many great options, how do you determine which editor is the one for you? Choosing the right video editing tool comes down to matching the tool’s strengths to your specific needs and creator persona. Here are a few considerations and strategies to guide your decision:
Define Your Content and Goals:
Start by reflecting on what kind of videos you make (or plan to make) and where you’ll publish them. Are you a YouTuber producing longer-form videos or a TikToker focusing on snappy 60-second clips? If you’re primarily making short social videos, a tool like CapCut or Picsart (with strong mobile support and quick effects) might serve you best. Podcasters or course creators dealing with long recordings should look toward AI-assisted tools like OpusClip or Capté to slice and caption content efficiently. SaaS founders or marketers might prioritize tools like InVideo AI or Abyssale that can pump out polished promos and multiple asset variants for campaigns. Essentially, choose a tool that aligns with your content format and output frequency.
Consider Your Budget (and Stick to It):
Budget is a real concern – and thankfully, there are quality options at every price point. If you’re just starting or cash-strapped, leverage free plans from tools like CapCut or Canva, which offer tremendous value without a dime spent. Many creators successfully run channels using free software, upgrading only when revenue starts flowing. If you do have some budget, be strategic: avoid signing up for too many subscriptions due to shiny-object syndrome (that temptation to try every new tool). Instead, pick one tool that covers your core needs and maybe a second specialized tool if absolutely necessary. Remember, most paid plans offer free trials – take advantage of those to ensure a tool is worth the money before you commit. Also, weigh monthly vs. annual pricing; if you’re in it for the long haul, annual plans can save you money, but monthly gives flexibility to switch if it’s not working out.
Ease of Use vs. Learning Curve:
Be honest about how much time and energy you’re willing to invest in learning a tool. If editing is a means to an end (getting content out) and not your main craft, lean towards a tool that’s easy and automation-heavy. For example, a busy solopreneur might prefer Veed's simplicity or Canva’s drag-and-drop approach over a steep learning curve of a pro editor. On the other hand, if you’re a budding filmmaker or really want to develop editing as a skill, you might not mind a more complex tool as long as it’s powerful. Also consider your patience for technical hiccups – web-based tools can be easier to use (no installs) but rely on a good internet connection, whereas desktop apps might demand more computing power and know-how to set up. Always choose the path that lets you spend more time creating and less time troubleshooting.
Automation and AI Features:
In 2025, AI is everywhere in video editing – but the key is to decide which AI features actually benefit you. If your workflow could benefit from auto-captioning, automatic cuts, or AI image generation, pick a tool that excels in those areas (e.g., OpusClip for auto-cuts, Capté for captions, InVideo for AI-generated scenes). AI can dramatically speed up repetitive tasks (like transcribing or resizing content) and free you to focus on storytelling and strategy. For a YouTuber who hates editing, an AI-driven tool might cut editing time from hours to minutes. However, if you love the craft of editing and want granular control, you might prioritize a tool with robust manual features over flashy AI. It’s all about finding the balance: the right tool should automate the boring stuff you don’t enjoy, and make the creative parts you do enjoy easier.
Integration and Scalability:
Think about how a video editor will fit into your broader toolkit and future plans. Do you need to integrate with other apps or workflows? For instance, some tools (like Abyssale) offer integrations with content management systems or social schedulers – useful if you plan to automate posting or work in a team setting. Also consider collaboration: if you’re a small creative team or agency, you’ll want a tool that supports multi-user collaboration (e.g., Canva or Veed with team accounts) so you can share projects and assets easily. In terms of scalability, imagine your content output a year from now – will the tool still meet your needs? Perhaps you’re a solo influencer now, but plan to launch an online course or hire an editor later. In that case, choose a platform that can scale up (with higher-tier plans or export options that a professional editor can work with). It’s perfectly fine to start with a free or basic plan and then upgrade or switch as you grow – many creators stack tools, using one for quick edits now and transitioning to another as their projects become more complex. The key is to avoid getting locked into an ecosystem that might hinder you later. Always ask: “Can this tool grow with me?” If not, ensure an easy exit strategy (for example, can you export your raw footage or projects to use elsewhere if needed).
Try, Tweak, and Decide:
Finally, don’t be afraid to test-drive multiple tools before committing. Each creator’s comfort level is different – you might find that the interface everyone else loves doesn’t click for you, and another one does. Most of the tools we listed have free trials or free versions; consider doing a quick project on a couple of them. For example, take the same short video and attempt to edit it in both CapCut and Veed – see which process felt smoother or produced results you liked more. Pay attention to how you feel during the edit: Were you frustrated or empowered? Did it cut your editing time or complicate it? Your intuition is a powerful guide. By trialing, you might also discover a two-tool combo works best (e.g., you use OpusClip to generate clips, then Canva to add your branding – an example of stacking tools to cover different needs). And remember, switching tools down the line is okay; you’re not marrying the software. The goal is to find a setup that right now boosts your productivity, fits your budget, and makes video creation a joy rather than a chore.
Bottom line: The right video editing tool is the one that fits your workflow like a glove. Consider what will save you time, maintain quality, and keep you within budget. Whether that means leveraging smart AI automation or sticking to a simple editor you can master quickly, the power is in your hands. Pick a tool, master it, but stay flexible – as your creative journey evolves, so can your toolkit.
Other Website Builders Worth Considering
Synthesia
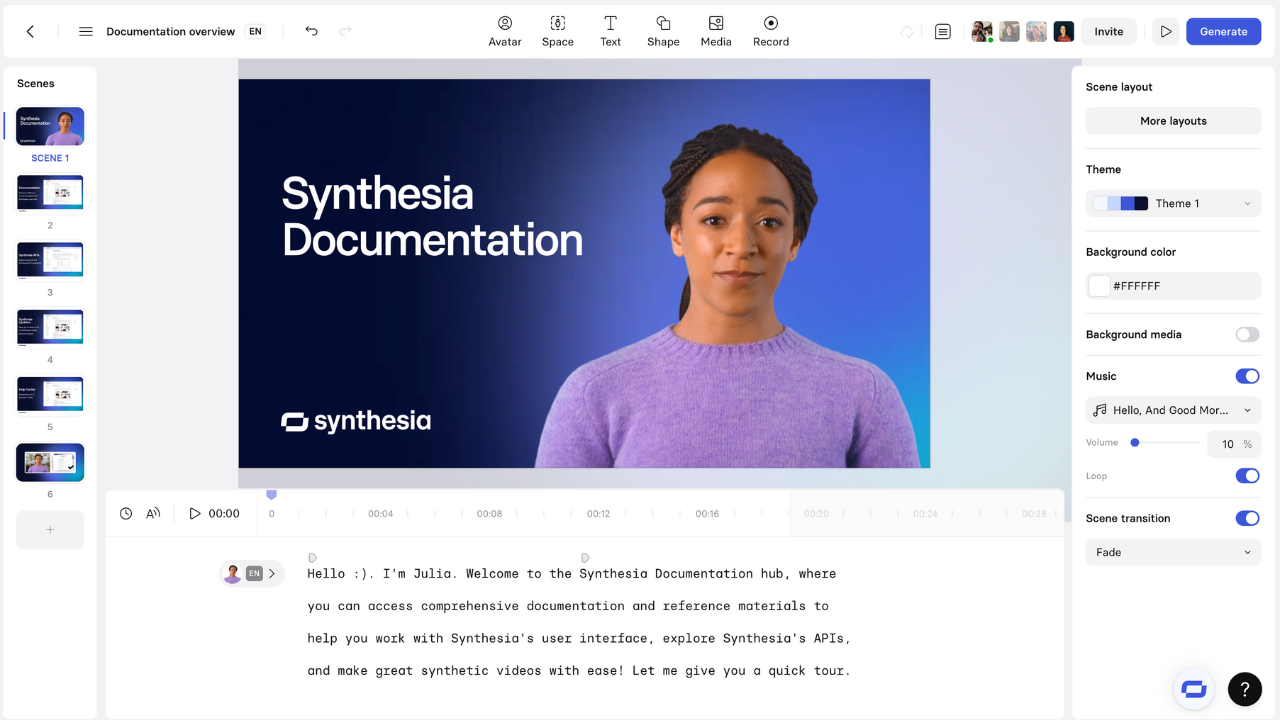
Synthesia enables you to produce on-camera style videos without cameras, actors, or a studio. Instead, you type your script, select from a range of realistic AI avatars, choose a voice (with over 140 languages supported), and generate a polished presenter-style video in minutes. It’s a game-changer for training materials, corporate updates, and multilingual marketing, where re-shooting content for each language would be too costly or time-consuming. Updates are as simple as editing the script—no need to book another shoot.
There’s no permanent free tier, but you can try a demo video. Paid plans start around $29/month on annual billing and include avatar selection, voice customization, HD exports, and branding options; enterprise tiers add custom avatars and template control. For creators delivering repeatable training or content across multiple languages, the ability to update and localize instantly makes Pro well worth the investment.
Creators Kit deal: 25% off for 12 months
VideoScribe

VideoScribe makes it easy for creators to produce engaging whiteboard-style animations without needing to learn motion graphics software. For course creators, coaches, and marketers, these hand-drawn explainers are proven to boost retention and simplify complex ideas. The interface is designed so you can drop in your script, choose from a library of illustrations and backgrounds, and animate the entire sequence in minutes. You can add your own voiceover or background music, match the timing to your narrative, and export in HD—ready for YouTube, course platforms, or social campaigns. It’s especially valuable if you want to stand out in a feed full of generic talking-head videos.
There’s no permanent free plan, but a trial lets you test the editor before committing. Paid subscriptions unlock unlimited exports, the full illustration and soundtrack library, custom fonts, and commercial use rights. Pricing typically starts around $17–$20/month on an annual plan, which is far cheaper than outsourcing animation work. For creators publishing lessons, tutorials, or explainer content regularly, the time and cost savings can be significant.
Creators Kit deal: Exclusive discount available
Lumen5
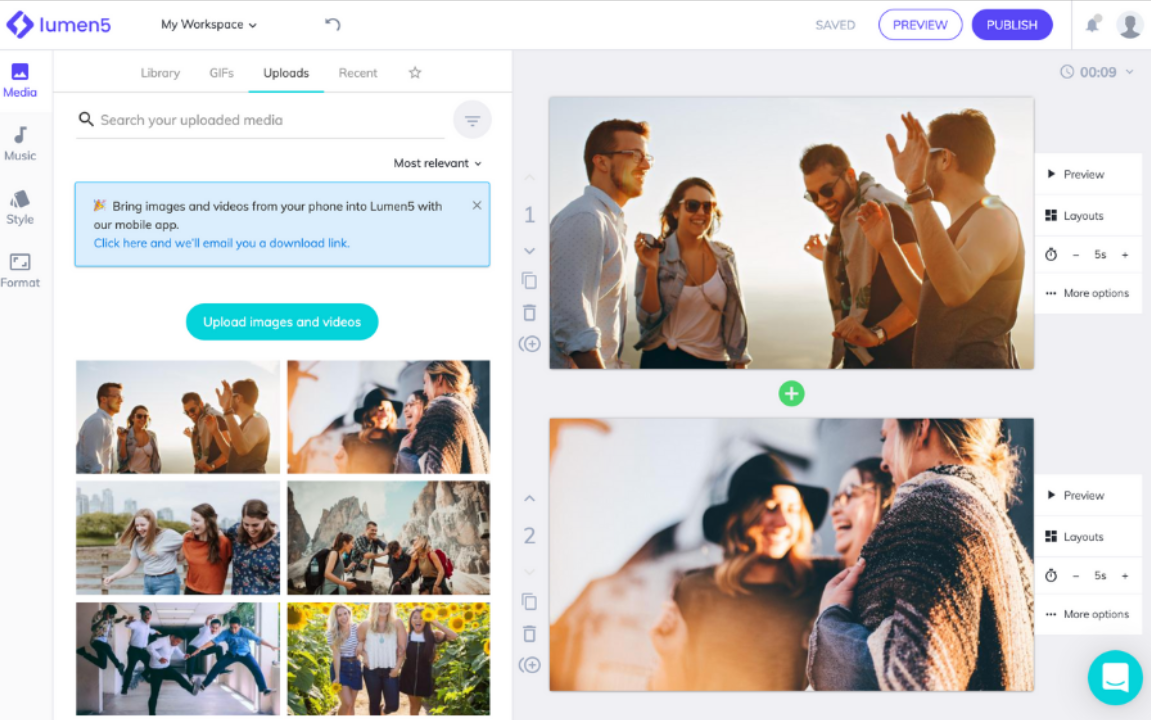
Lumen5 is an AI-powered platform that turns blog posts, outlines, or even plain text into polished social videos. It’s a strong pick for creators who need to keep up a consistent output on LinkedIn, Instagram, and YouTube without a full-time video editor. The workflow is simple: paste your content, let Lumen5 automatically storyboard it with relevant stock footage and captions, then refine it with your brand kit. The system handles multiple formats and aspect ratios, so a single piece can be repurposed for Reels, Shorts, or a LinkedIn landscape post.
A free plan is available, but exports carry a watermark, media options are limited, and resolutions are capped. Paid plans—starting at roughly $29/month when billed annually—remove the watermark, unlock premium styles, add custom branding, and allow higher-resolution exports. For anyone producing even a handful of branded videos each month, upgrading is worth it for the professional finish alone.
Creators Kit deal: 35% off on any plan
Motion Array
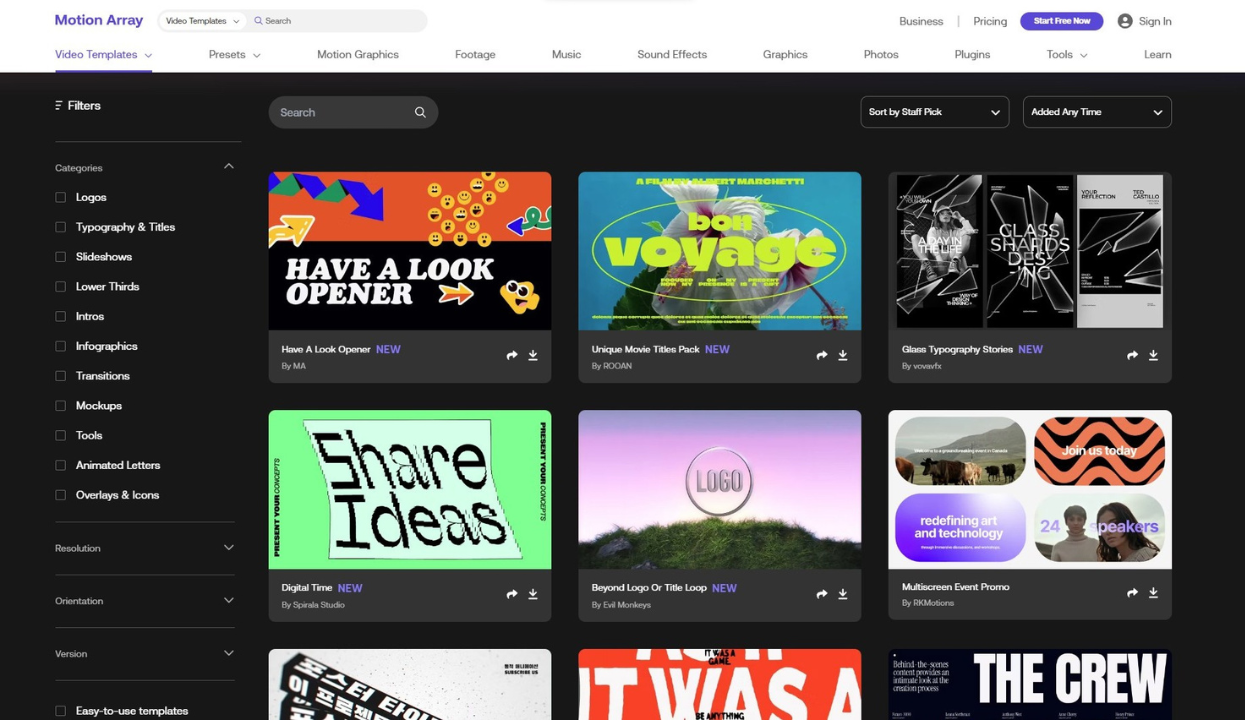
Motion Array is a one-stop subscription for high-quality video production assets. Instead of piecing together stock footage from one service, music from another, and templates from yet another, creators get unlimited access to all of it—stock footage, motion graphics templates, music, sound effects, LUTs, and plugins for major editing software—under one license. It’s particularly valuable for YouTubers, social video producers, and agencies who need to move from concept to polished edit without wasting hours sourcing assets.
The free version offers only a small sample library, so professionals will want the Pro or Everything plans, which unlock unlimited downloads, all premium templates, and the built-in portfolio and collaboration tools. Pricing starts at about $29.99/month on an annual plan. For anyone publishing regularly, the time saved not having to hunt for compatible assets easily outweighs the subscription cost.
Creators Kit deal: $50 off on "Pro" and "Everything" annual plans
Wideo
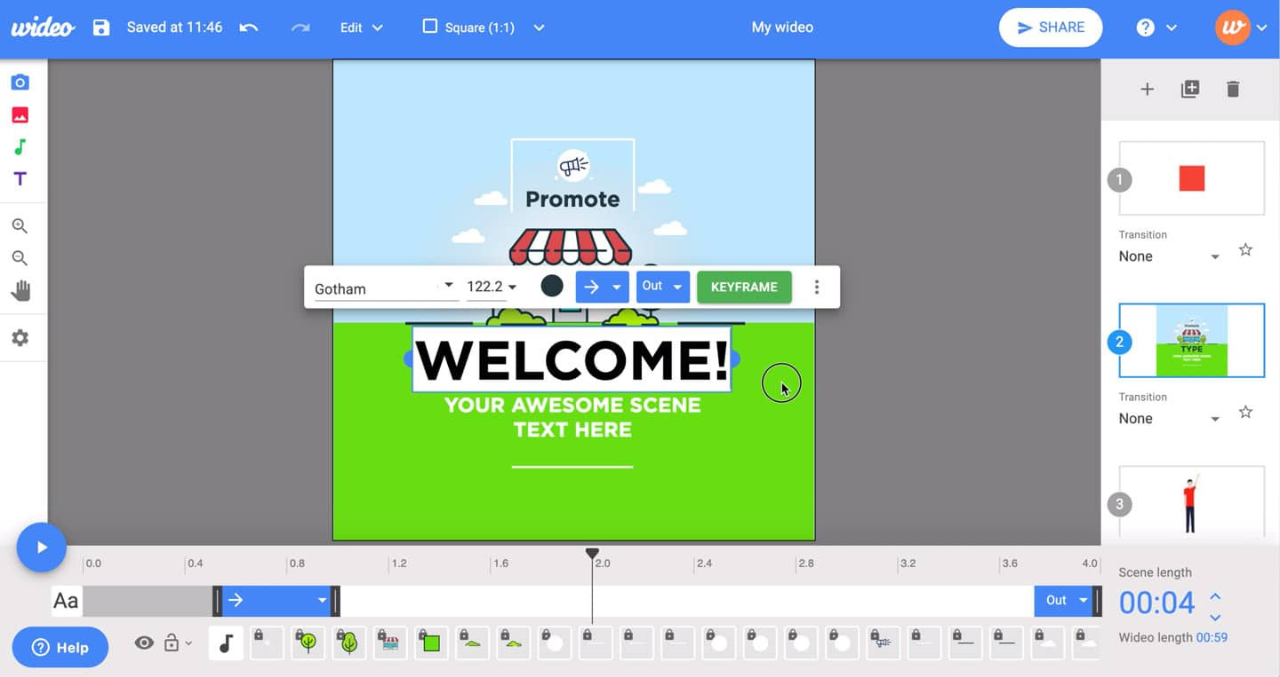
Wideo offers a fast route to professional animated videos and presentations without needing advanced animation skills. Using pre-designed templates, you can build marketing videos, explainer animations, or internal communications pieces by customizing text, images, and scene order. The platform is ideal for small businesses, social media marketers, and educators looking to inject motion graphics into their content without the overhead of After Effects.
The free option is just a trial, with paid plans starting around $19/month when billed annually. Upgrading gives you HD exports, longer video durations, full access to templates, and commercial usage rights. If you produce promotional or instructional videos regularly, Wideo’s efficiency and quality can easily justify the subscription cost.
Creators Kit deal: 25% off on any plan
Tella
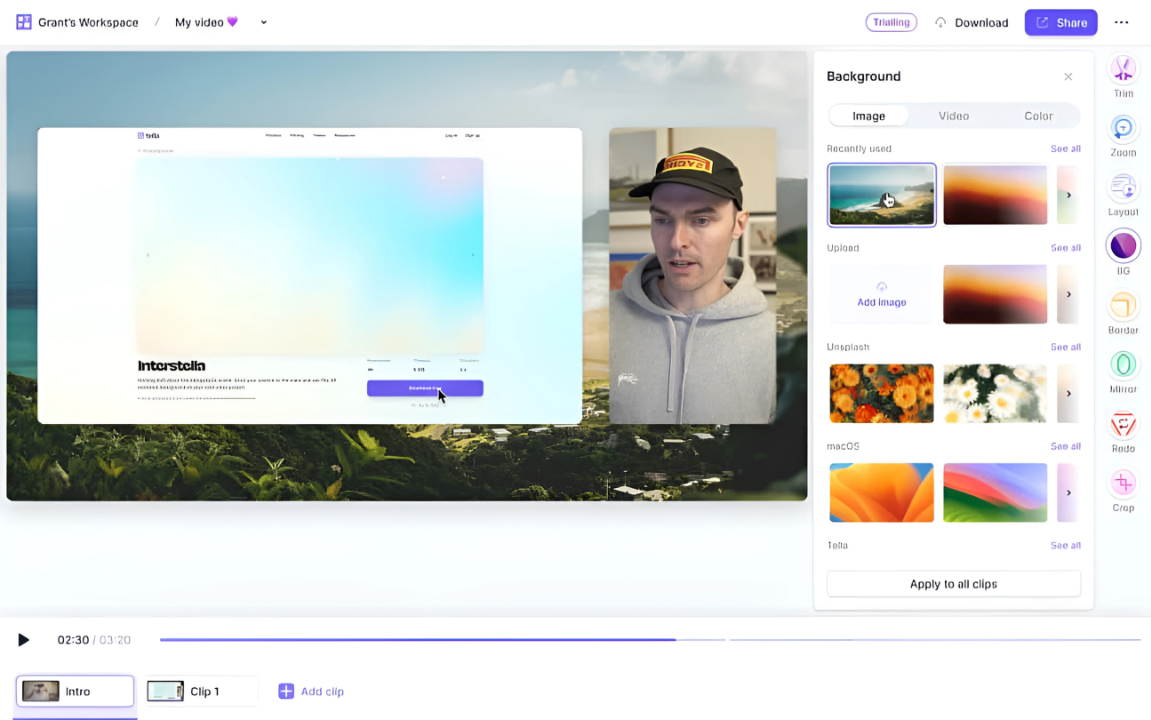
Tella simplifies recording and sharing screen + camera videos for demos, tutorials, and customer updates. You can record in your browser, switch between layouts like picture-in-picture or fullscreen, and edit out mistakes before sharing or exporting. Background customization, captions, and quick export options make it particularly suited for creators who need to deliver clean, professional walkthroughs without heavy editing.
A free plan is available but adds a watermark and limits recording length. Paid plans start around $15/month per user and remove the watermark, allow longer recordings, unlock branding features, and enable custom domains for share links. For creators producing weekly tutorial or sales videos, the Pro plan offers speed and polish that make it a time-saver.
Creators Kit deal: 30% off on any plan
Pictory
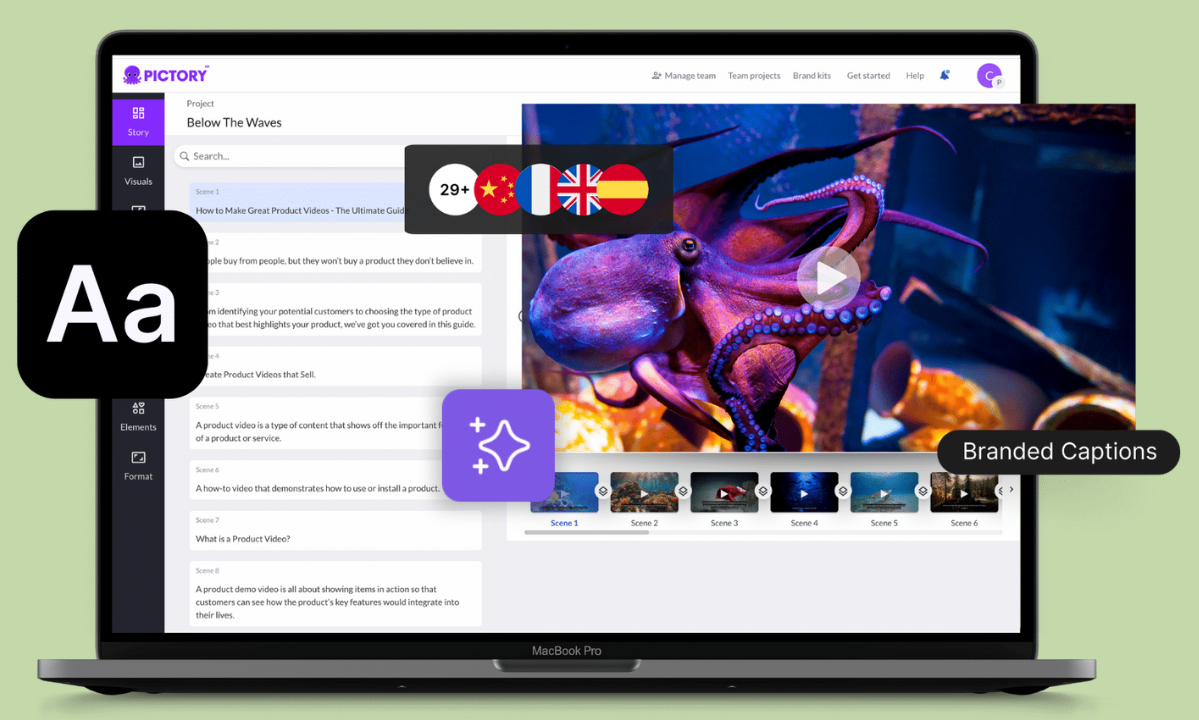
Pictory helps you turn long-form content—like blog posts, webinar transcripts, or whitepapers—into short, engaging videos for social media or summaries. Simply paste in your text, and the platform will auto-scene it with stock visuals, music, and a voiceover. You can then tweak timing, replace visuals, and add brand elements for a consistent look across your clips.
The free trial offers limited exports, while paid plans start at roughly $19/month annually, unlocking higher resolution, brand presets, and more editing control. For creators following a “one long video → many short clips” strategy, Pictory acts as a content multiplier, saving hours in repurposing time.
Creators Kit deal: 20% off on any plan
Ready to Choose Your Editor?
Treat this lineup as a creative toolkit, not a “best to worst” list. Match each editor’s strengths to the type of content you produce—AI auto-clipping for repurposing podcasts into Reels, template-based animation for marketing explainers, full-stock libraries for YouTube productions, or text-to-video AI for rapid multilingual campaigns. Then weigh the trade-offs: speed vs. fine-tuned control, built-in stock assets vs. external sourcing, subscription cost vs. output volume. A short trial run with two or three of your top picks will reveal more than hours of comparing features on paper.
Once you find the tool that fits your workflow, claim the Creators Kit deal before you start your first project. The discounts stretch your budget in the critical early months, freeing resources for extras like premium stock packs, collaboration upgrades, or specialized plugins.
Edit smart, publish often, and focus on telling stories that keep your audience coming back.
FAQs
If we’re talking specifically about creating short vertical videos for TikTok, Instagram Reels, or YouTube Shorts, tools that automatically find and format highlights are the most helpful. Opus Clip is one of the best for this – it detects compelling moments in a longer video and outputs ready-to-post vertical clips with captions. Klap is another strong choice, very similar in function. Both of these save tons of time compared to manual editing. If you prefer doing some editing yourself but want AI assistance, CapCut (mobile app) offers auto-captions and some smart editing templates, and Veed (web app) provides easy editing with features like auto subtitles and filters. So the “best” might be Opus Clip for full automation, but if you need a free solution, CapCut is a great mobile-friendly alternative. It also depends on your content – try a couple and see which output you like more.
Absolutely – many creators stack tools to leverage each one’s strengths. It’s common to, say, use OpusClip to auto-generate clips from a long video, then fine-tune those clips in CapCut or add titles in Canva. Using multiple tools can be efficient if each tool handles a specific task exceptionally well. The key is a smooth hand-off: ensure the tools you pick can import/export in compatible formats (most use standard .mp4 video files, so that’s usually fine). An example workflow might be: edit your main video in a simple editor, export it, then run that through another app for captions or fancy effects. Or vice versa – design a cool animated intro in Canva, download it, and drop it into your timeline in Veed alongside your footage. There’s no rule that you must stick to one editor for everything. The caution is to not overcomplicate things – juggling too many apps might introduce extra rendering steps or quality loss. But in moderation, combining tools is a smart way to get the best of each. Many of the tools we discussed complement each other, and moving files between them is straightforward. As you experiment, you’ll find a toolkit mix that maximizes speed and quality for your workflow.
First, get a transcript of your video or podcast. Many AI tools do this automatically (Opus Clip and Klap will transcribe as they analyze; or you can use Descript or even YouTube’s auto captions to get a transcript). Once AI has the transcript, tools like Opus Clip use algorithms to pick out quotable, engaging sections – often based on where the speech is exciting or the content is rich. They’ll cut those sections out, add subtitles, and format everything into short videos. In practice, you upload your video (or audio) to the AI service, wait a few minutes, and then you’ll receive a selection of clip files. Review those and choose the best. For a podcast (audio-only), you might use a tool that can add visuals to your audio clip – for example, Kapwing or Headliner will turn audio into a video with a waveform and captions. The key is the AI saves you from scrubbing through the entire recording yourself. It’s like having an assistant find all the sound bites for you. Just keep an eye out to ensure each clip still makes sense on its own (sometimes you might need to tweak the start/end point).
Online (cloud-based) video editors have come a long way – for many everyday purposes, they can absolutely match desktop software in results, with the bonus of convenience. Modern web editors like Veed, Canva, or Clipchamp (to name another) are capable of producing crisp 1080p or even 4K videos with transitions, effects, and all the polish of a desktop-edited video. They simplify a lot of tasks and eliminate the need for a powerful computer since processing can happen on the cloud. That said, “traditional” desktop software (like Adobe Premiere Pro, Final Cut Pro, or DaVinci Resolve) still has the edge in certain areas: they’re typically more powerful when it comes to advanced features (detailed color grading, special effects, motion graphics, plugin support) and can handle very large, complex projects better. Professional editors working on films or high-end YouTube content often prefer desktop programs for that granular control and reliability with huge files. However, those tools also have a steep learning curve and cost, which isn’t necessary for most creators’ needs. If you’re a solo creator making content for social media or doing simple edits, online editors are not just “good enough” – they’re often ideal. They allow collaboration (share a link and someone can review your edit), and you never worry about software updates or file compatibility between devices. One consideration is internet dependency: if you have slow or unstable internet, cloud editing can be frustrating, whereas desktop software works offline (aside from downloading assets). Also, privacy can be a factor – if you’re editing super confidential footage, some prefer to keep files locally rather than upload to a cloud service. In summary, for a huge segment of creators – especially those prioritizing speed, ease, and accessibility – online editors are as good as needed and will produce professional results. Traditional desktop software is “better” in an absolute sense for complex work, but it can be overkill. Many people actually use a hybrid approach: quick projects online, big projects on desktop. Evaluate what you’re creating: if a web editor checks all your boxes, don’t hesitate to use it. The quality of your content ultimately comes from your creativity and consistency, and both online and offline tools are just means to that end. Happy editing!
For most beginners, an easy-to-use editor like CapCut or Canva is a great start. These tools have intuitive drag-and-drop interfaces and plenty of templates, so you won’t be overwhelmed. CapCut, for example, is free and very beginner-friendly – you can trim clips, add music, and apply effects with almost no learning curve. Starting with a simple tool lets you focus on content rather than complex settings. As you gain confidence, you can stick with it or move to more advanced software if needed, but many creators find that beginner-oriented apps already do everything they require for social media and basic YouTube videos.
To dodge overspending or falling victim to shiny-object syndrome, take a strategic approach. First, use free trials whenever possible – test the full features of an editor for a week or so to see if it truly fits your workflow. Second, be clear on what you need. It’s easy to be lured by fancy AI features or ultra-advanced tools that you might never actually use. Make a list of your must-have features (e.g., auto-captions, specific effects, collaboration) and choose a tool that meets those needs without a ton of extras you don’t require. Third, start with short-term subscriptions. Instead of paying for an annual plan upfront, try month-to-month for a couple of months. This way if you realize a tool isn’t worth it, you can cancel without a large sunk cost. Finally, focus on one solution at a time. It’s tempting to subscribe to multiple apps when they’re all being hyped, but this can lead to paying for several tools and using none effectively. Master one editor that covers 80% of your needs rather than juggling (and paying for) five different ones. In summary, trial, evaluate, and commit slowly – and you’ll spend your budget on the tool that truly boosts your creation process.
To automatically generate captions, you can use AI-powered tools or apps. For example, upload your video to a platform like Veed.io or use a mobile app like CapCut – both have an “auto subtitle” feature. These tools use speech-to-text AI to transcribe your audio into captions within seconds. YouTube also auto-generates captions if you upload your video (check the CC options in YouTube Studio). Once generated, review the captions for accuracy, as auto tools aren’t perfect. With one click and a quick edit, you can generate captions automatically for most videos without manual typing.
It’s normal for your needs to evolve – maybe you start with quick Instagram videos and later move into longer YouTube documentaries or a team project. If you feel you’ve outgrown your current editor, you have a couple of options. One is to upgrade within the tool’s ecosystem if possible. For example, if you began on Canva Free and now need more storage or premium assets, moving up to Canva Pro might solve your issues without you learning a new interface. Likewise, CapCut has higher-tier plans (Standard/Pro) that unlock more capabilities, which could extend its usefulness for you. Alternatively, it might be time to switch to a more advanced platform. Many creators graduate from a beginner tool to something more robust (like eventually moving to Adobe Premiere Pro, DaVinci Resolve, or Final Cut for full-scale editing). The good news is the fundamentals you learned will carry over – cutting, timeline management, etc., are similar concepts in pro software, just with more depth. When switching, plan it during a period you can afford extra learning time (not right before a major deadline). Also, ensure you can transfer your assets: always save your raw video files, exports, and any graphics so you can import them into the new software. One more approach is hybrid use – keep using your simple tool for what it does well, but handle new needs in another app. For example, maybe you keep using Veed for quick projects but hire an editor with Premiere for a complex project, or you do basic cuts in CapCut then fine-tune color and sound in a higher-end tool. Outgrowing a tool isn’t a failure; it’s growth. Treat it as a sign you’re ready for the next level. The key is to continuously evaluate your toolkit – if something is slowing you down or limiting your creative vision, it’s time to explore other solutions that better match where you are now as a creator.


.png)


